Learn how to create your first subscription with Verified Subscriptions. This guide will help navigate you through the subscription creation process. This guide walked you through creating a recurring subscription plan, linking it to a product, organizing with tags, adding descriptive details, and setting up cancellation reasons to better understand customer feedback.
Introduction: In this guide, you'll learn how to create your first subscription with the Verified Subscriptions App, as well as how to create additional plans in the future.
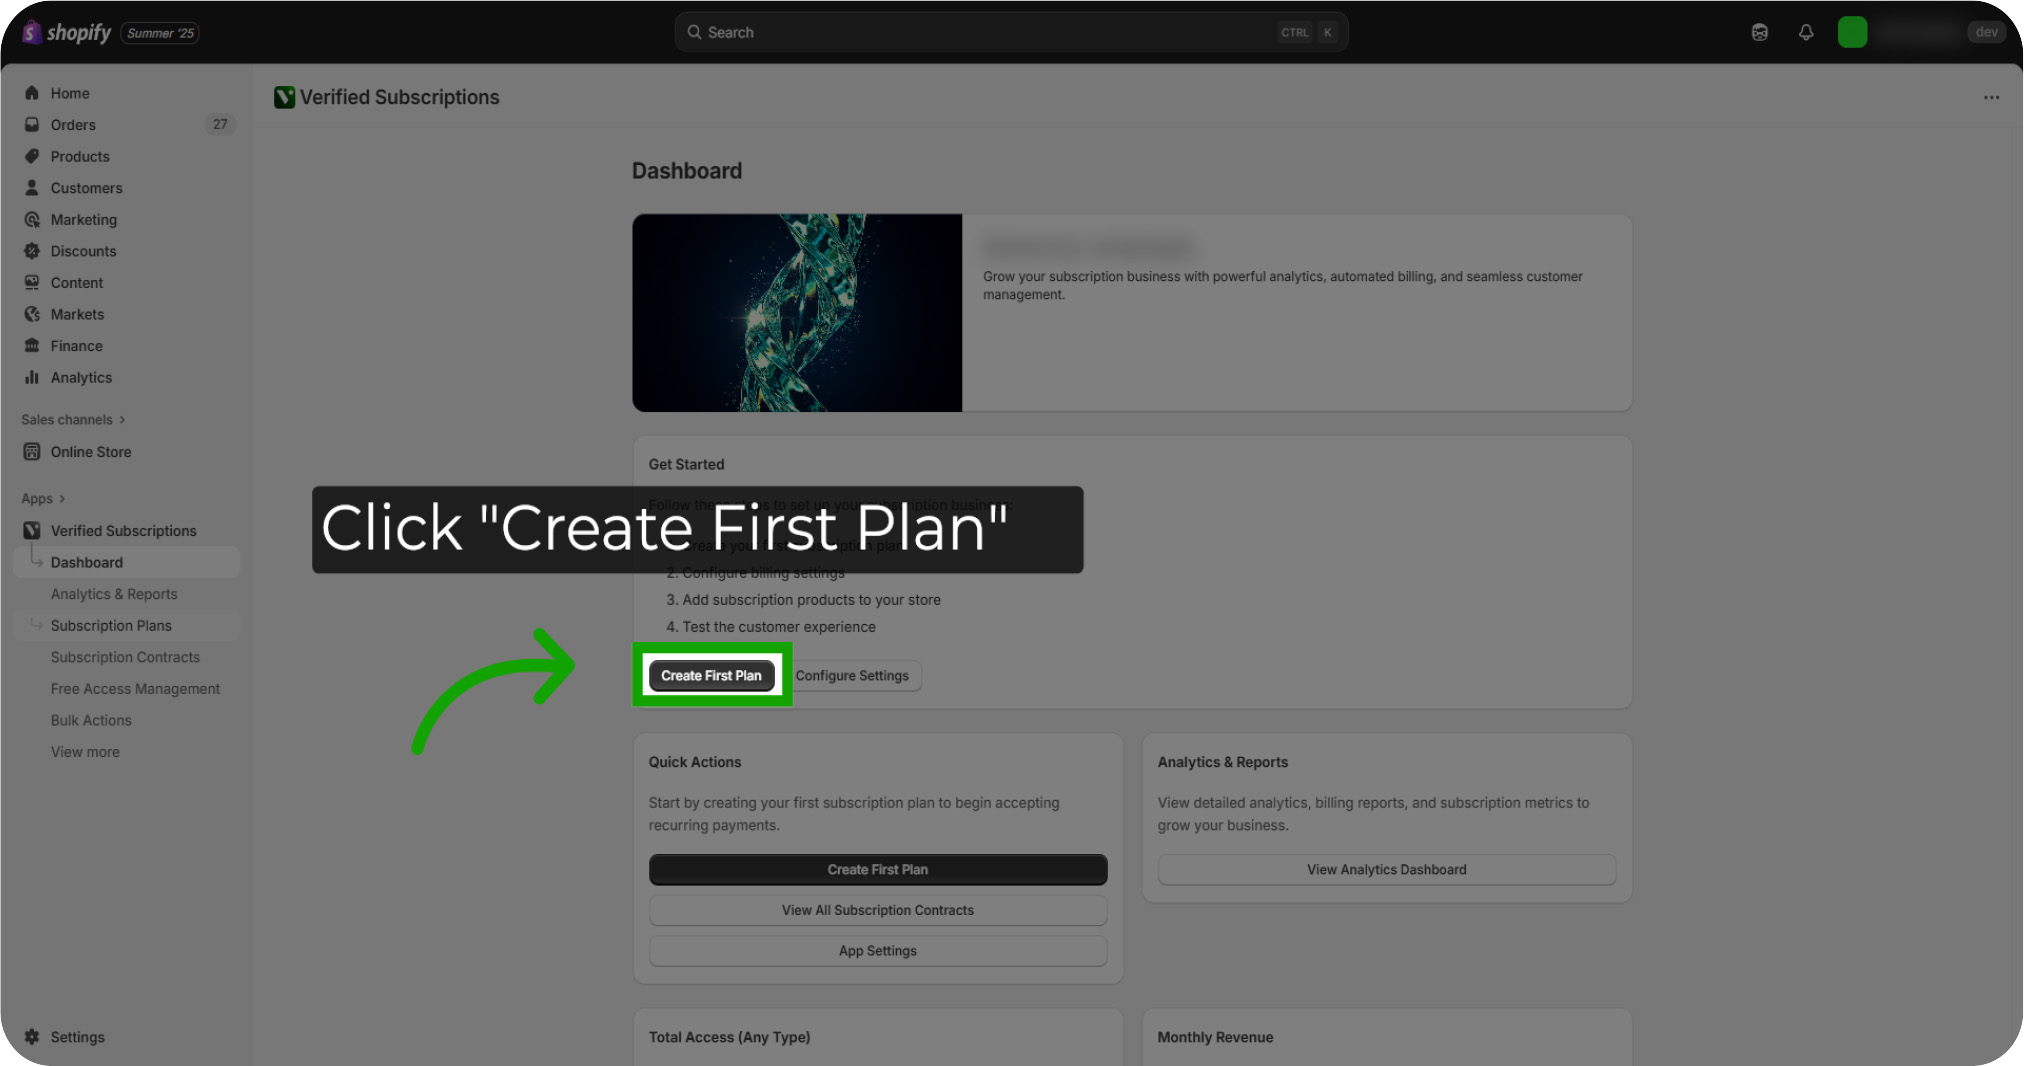
Click "Create First Plan": For your first Subscription, navigate to the "Create First Plan" button located on the Dashboard page
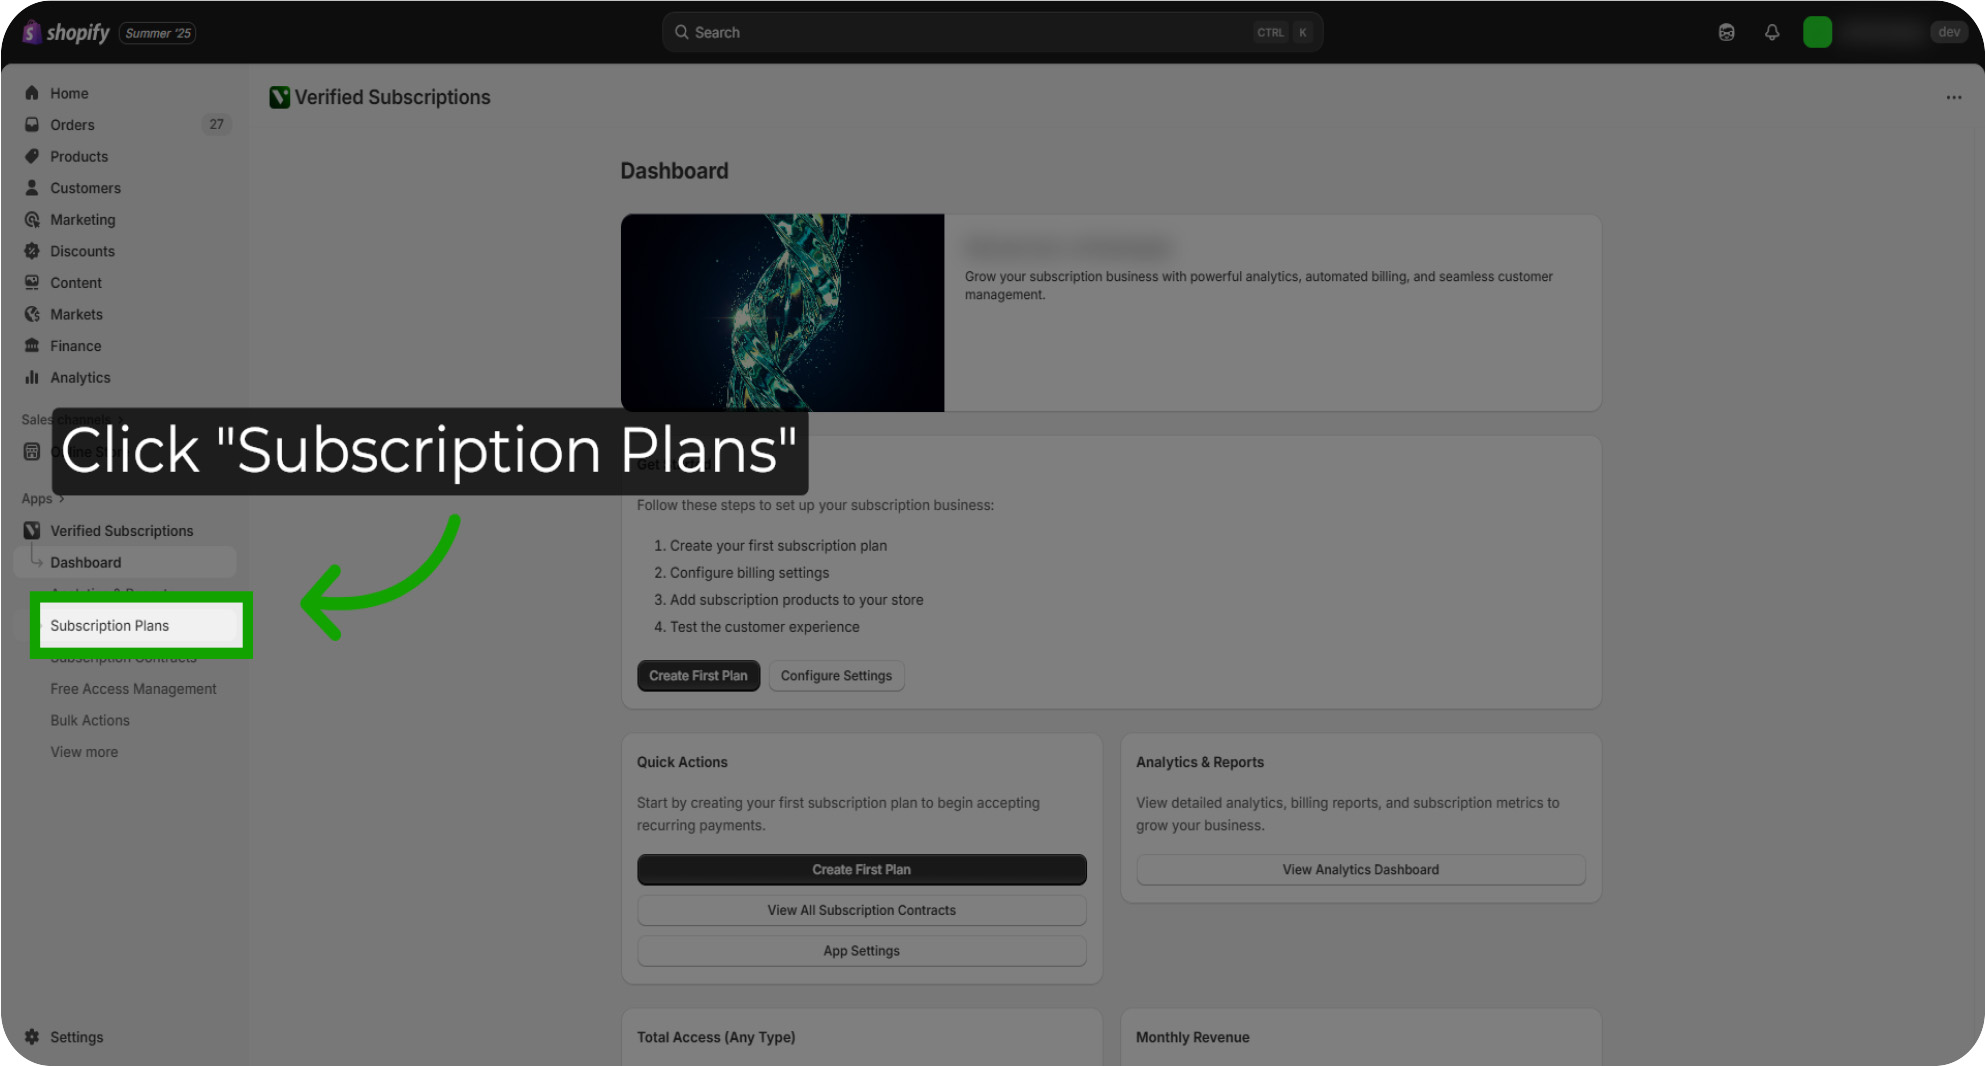
Creating Future Plans: For future subscriptions, you can click on the "Subscription Plans" section to explore and manage your available subscription options.
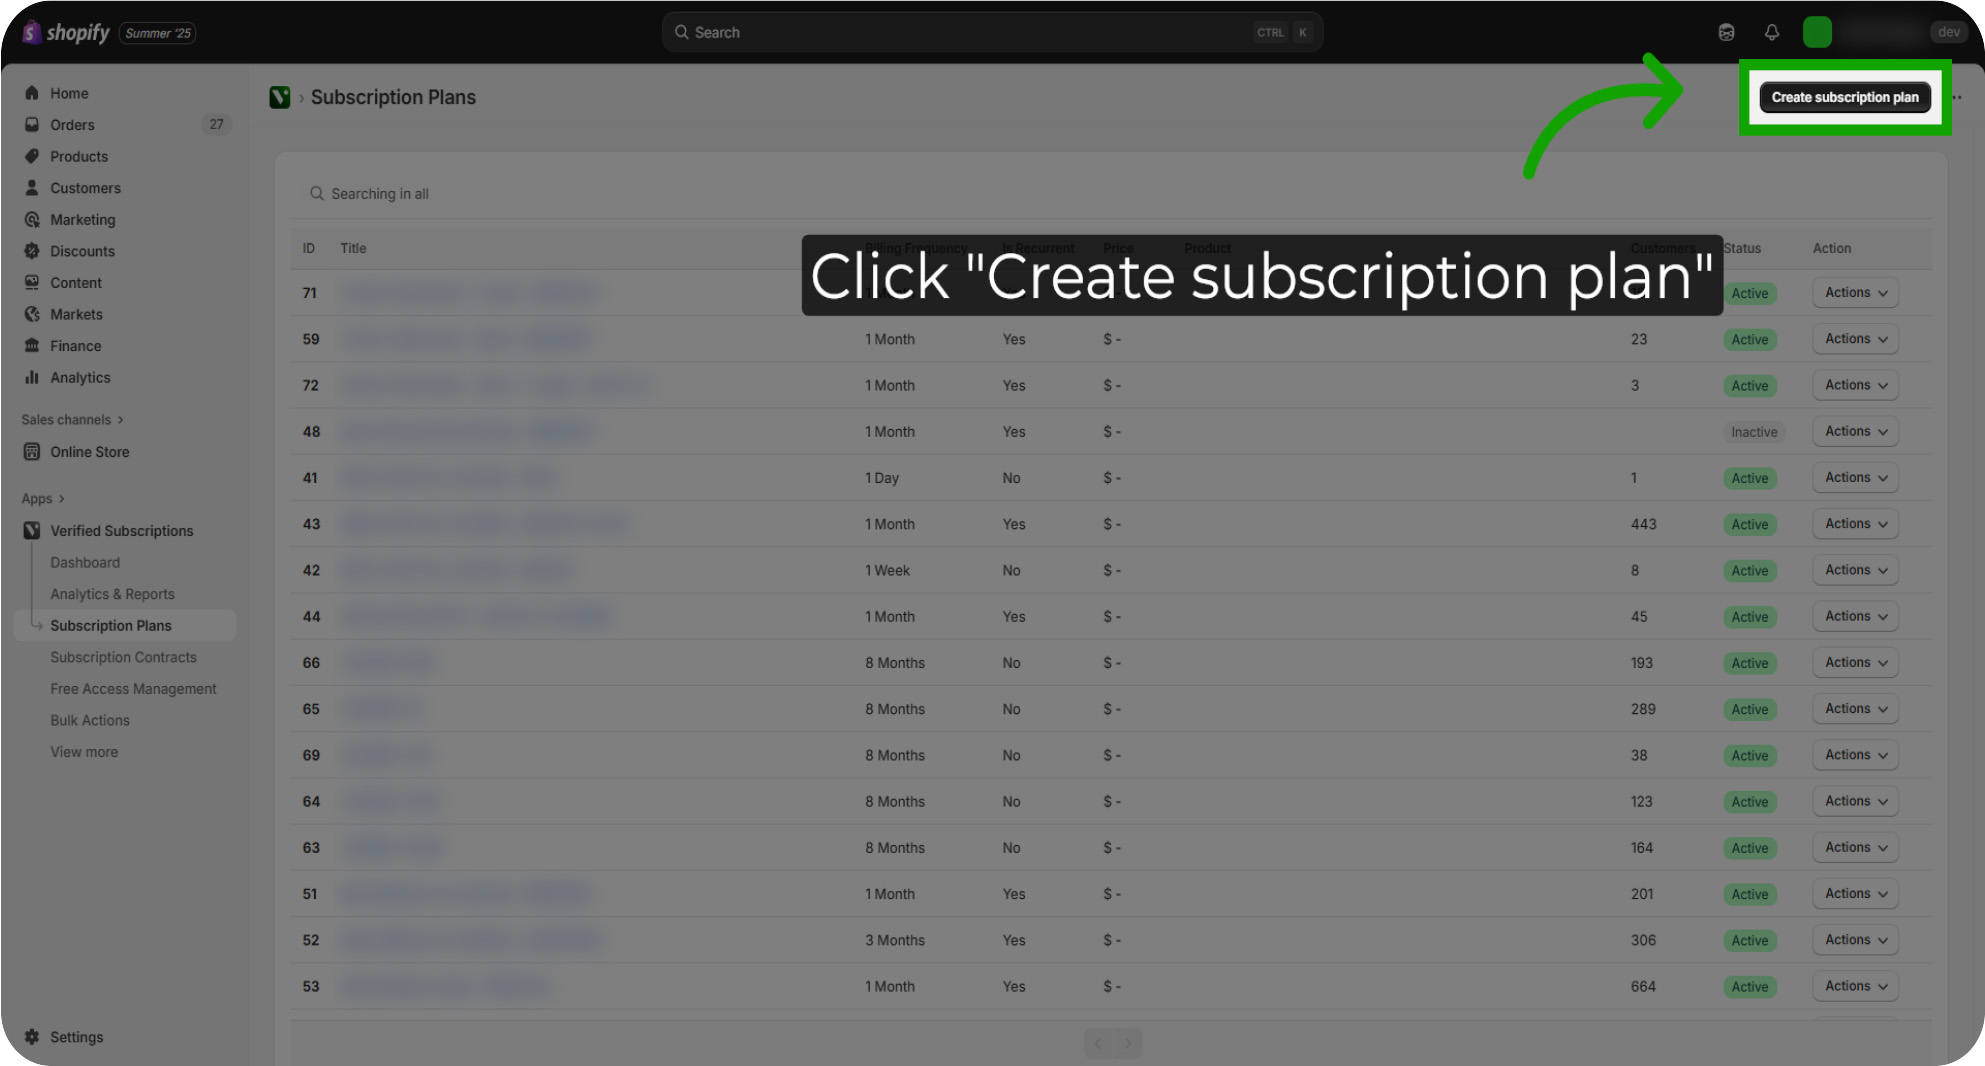
Creating A New Plan: Once on the "Subscription Plans" page, navigate to the "Create Subscription Plan" button located at the top right of the page.
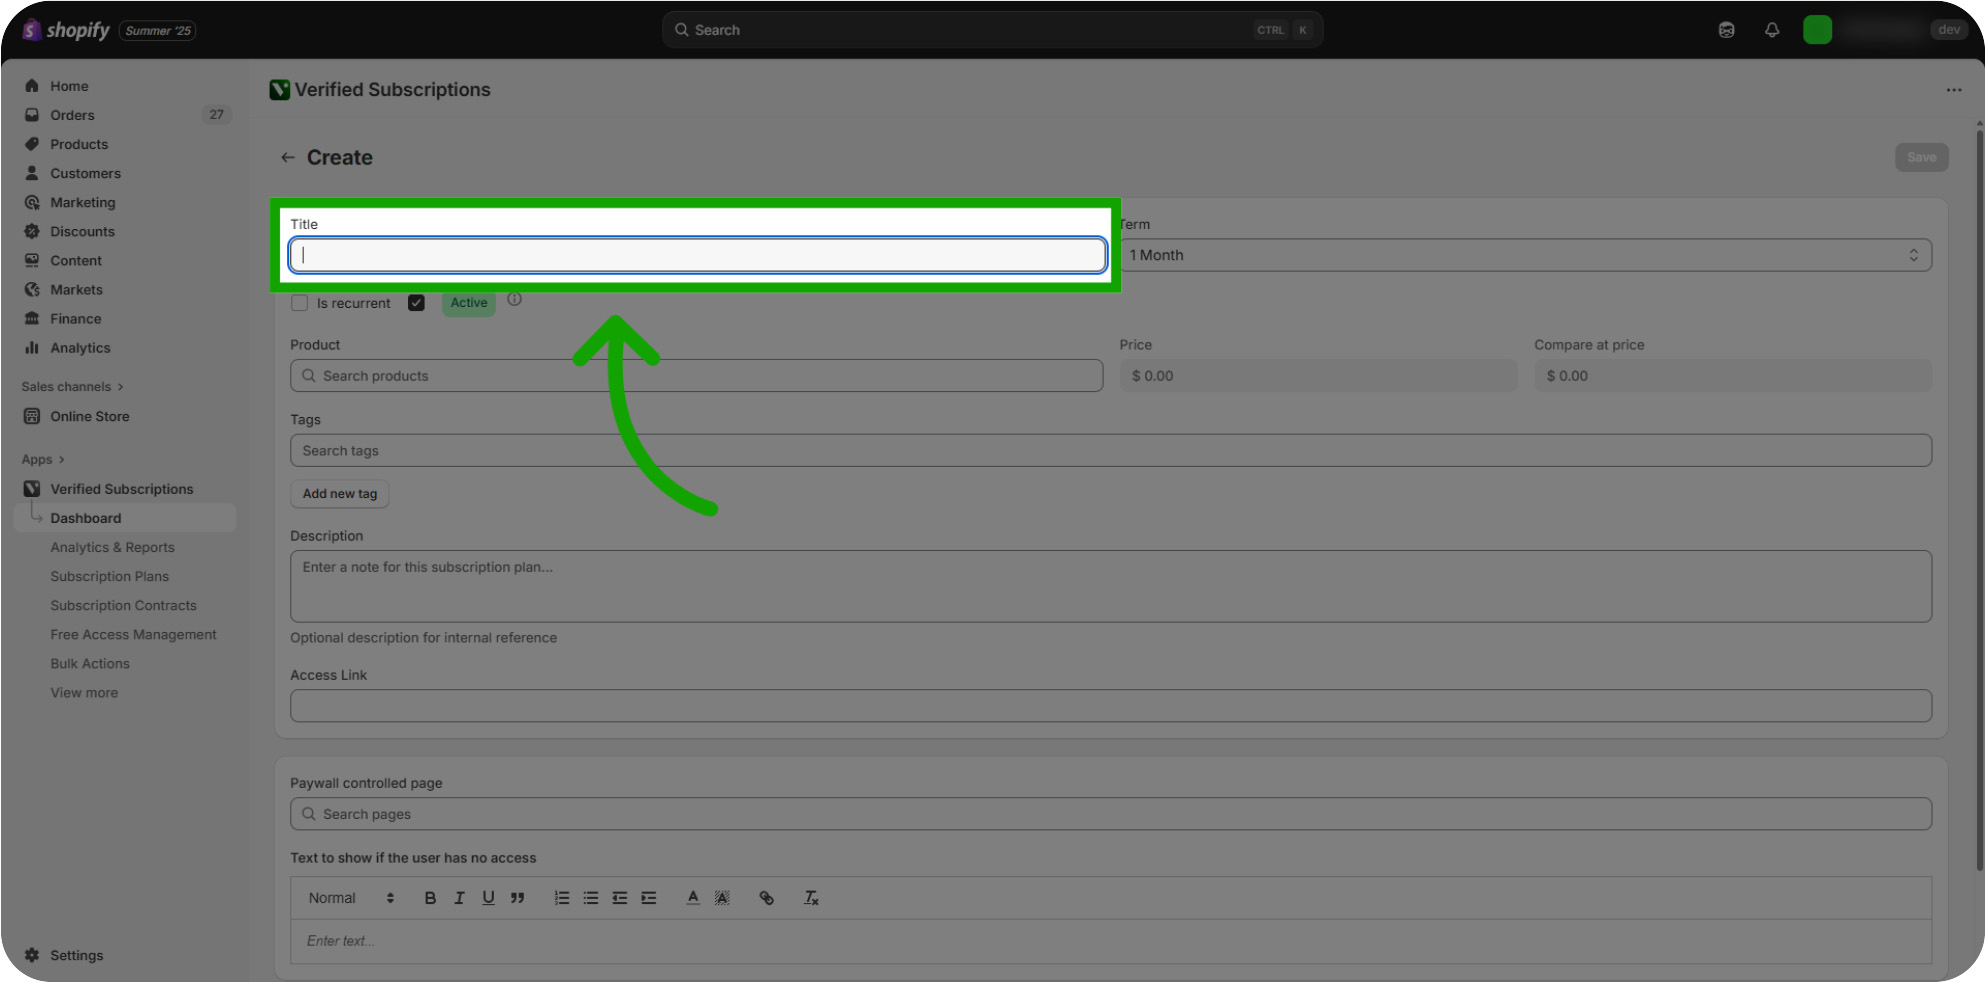
Setting A Title: Begin by entering the title of your Subscription Plan. This will help identify your plan in the Verified Subscriptions App
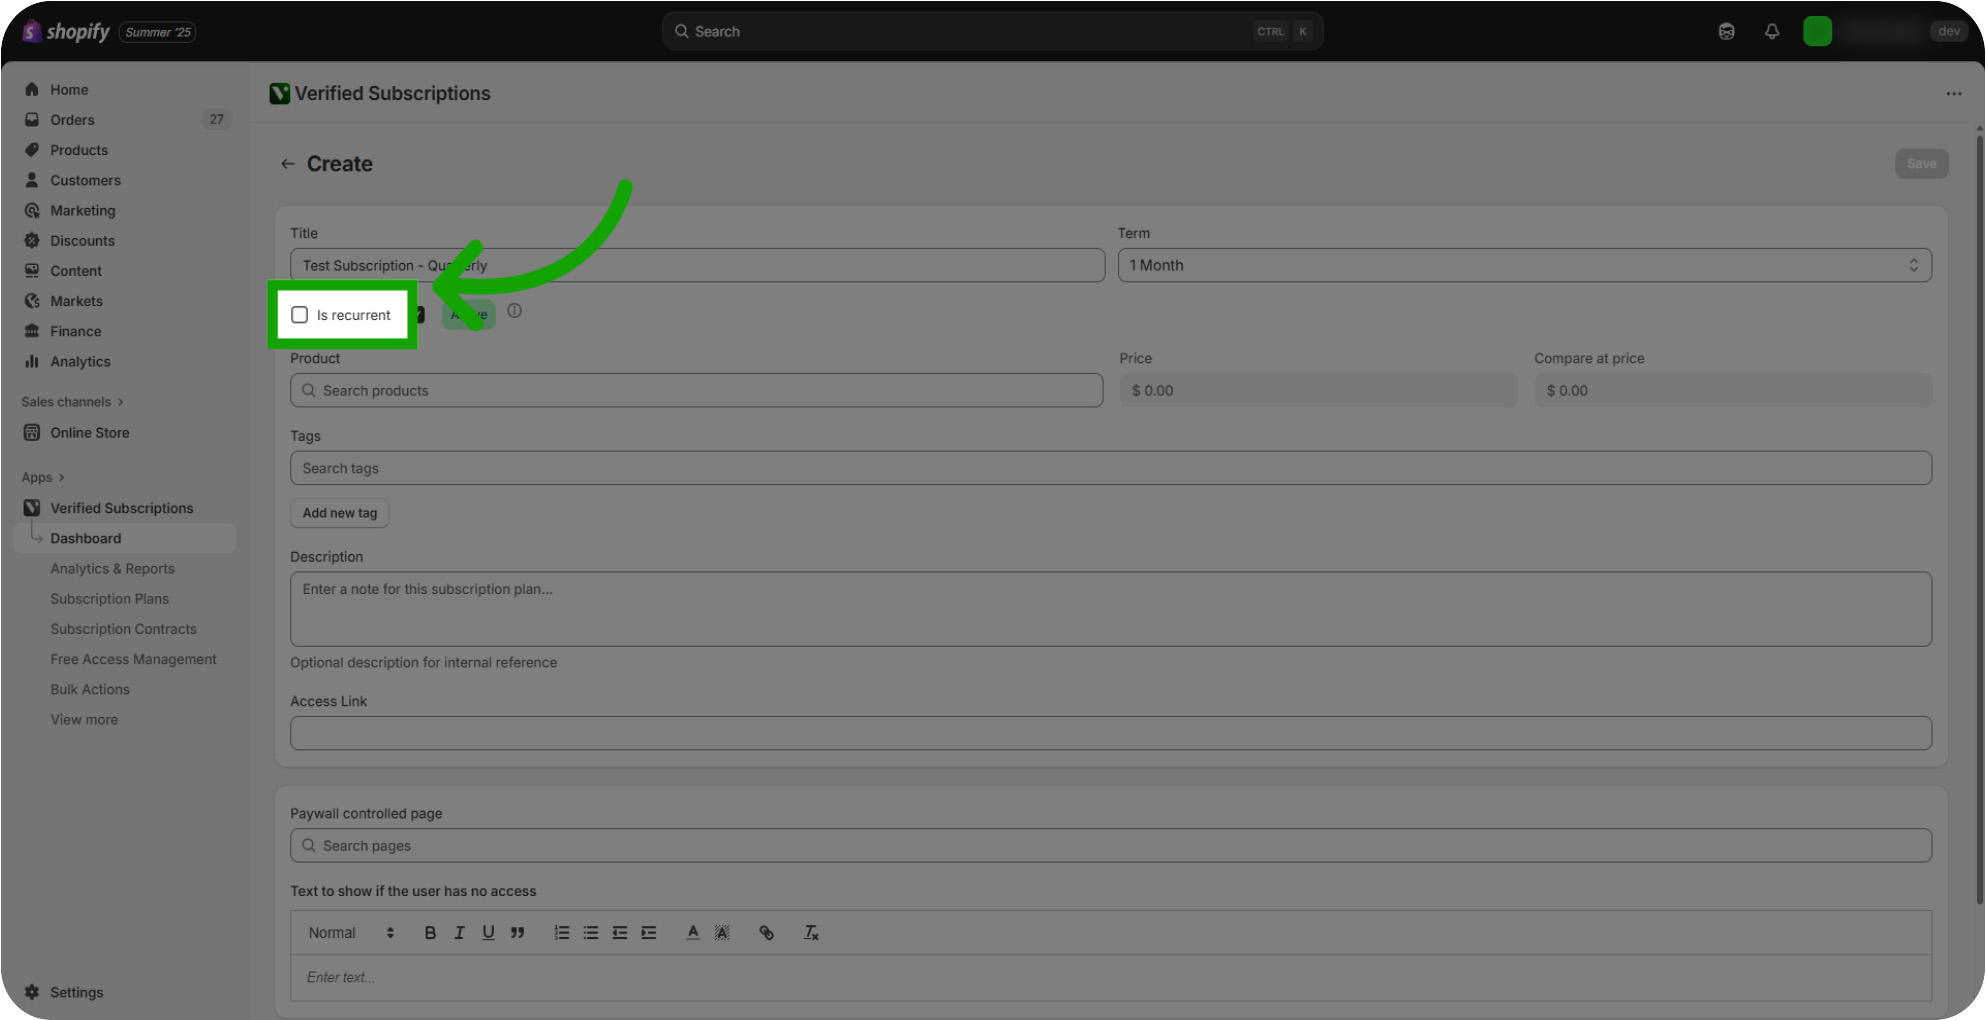
Enabling The "Recurrent" Setting: If the Recurrent setting is enabled, this Subscription Plan will automatically renew each term based upon the term duration set. Subscribers will always be billed based upon their initial date of purchase.
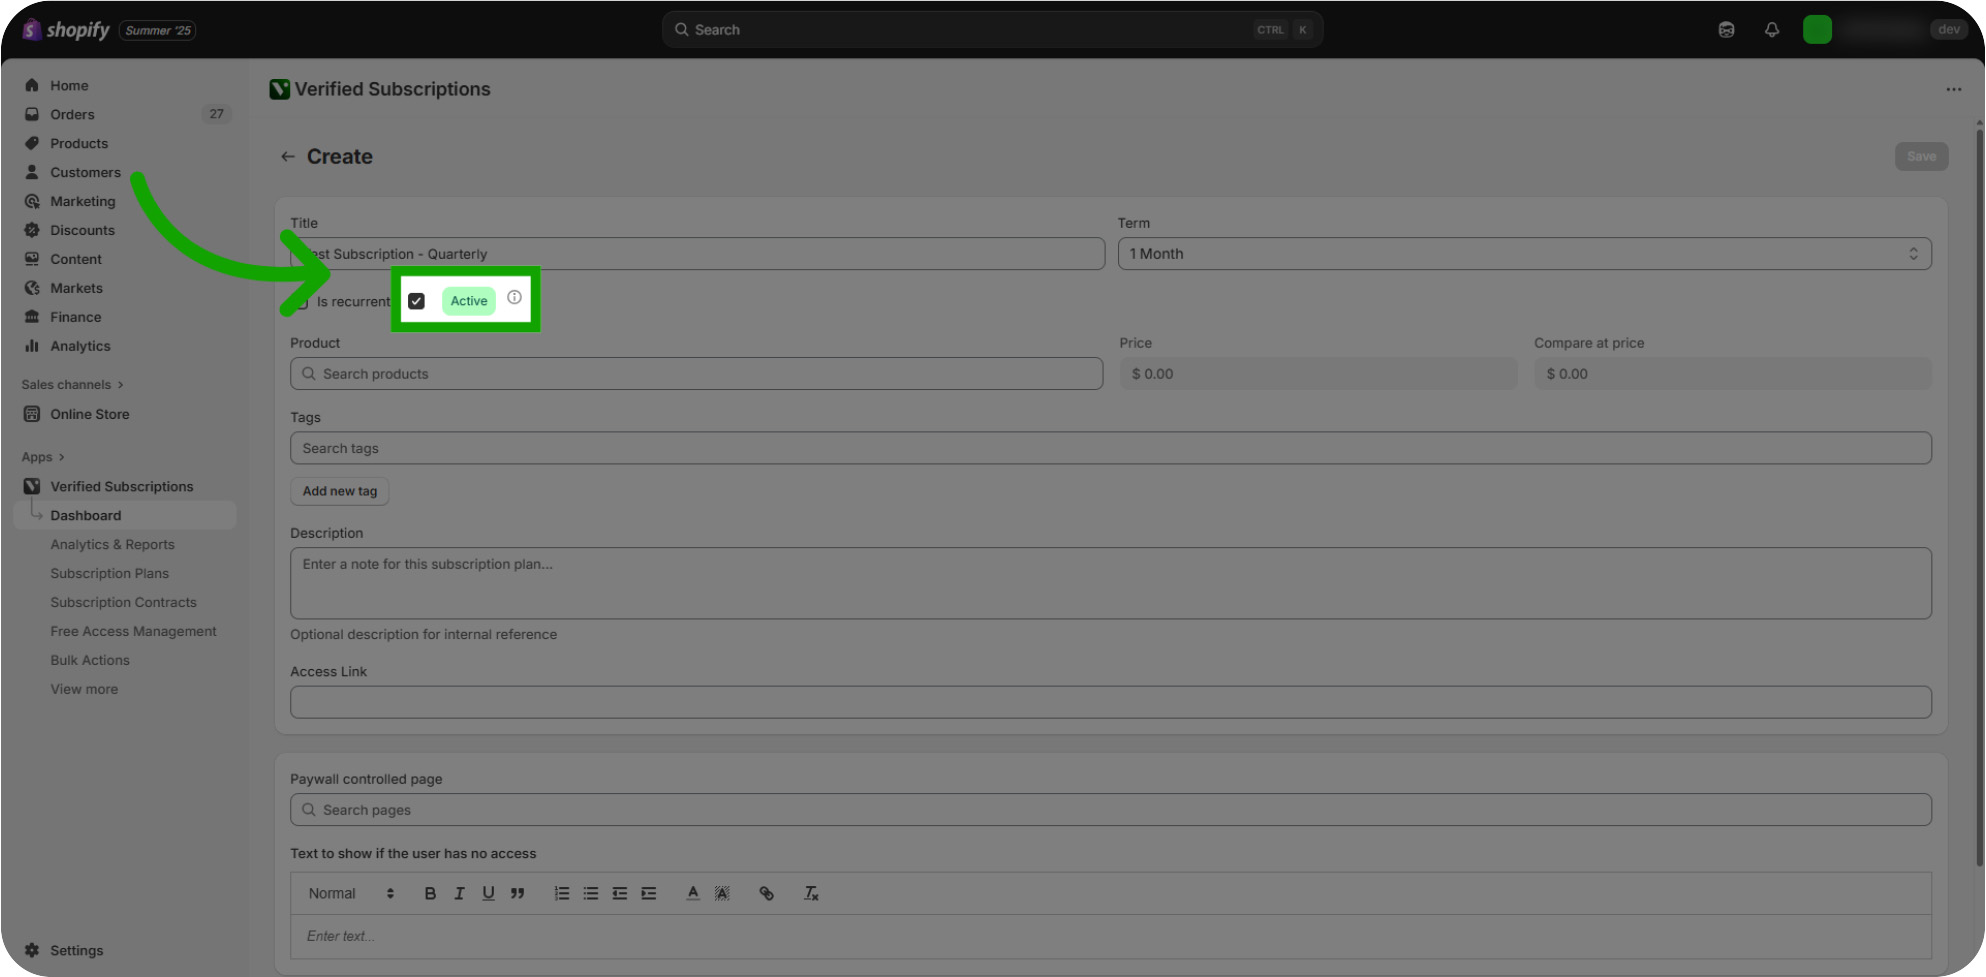
Enabling The "Active" Setting: The Active setting determines if your Subscription Plan will be visible on your Store for purchase. By default, this setting is turned on, but can be disabled to discontinue a plan for new Subscribers without ending a Subscription for existing Subscribers. Please note that existing subscribers will continue to be rebilled if a disabled plan is set to Recurrent.
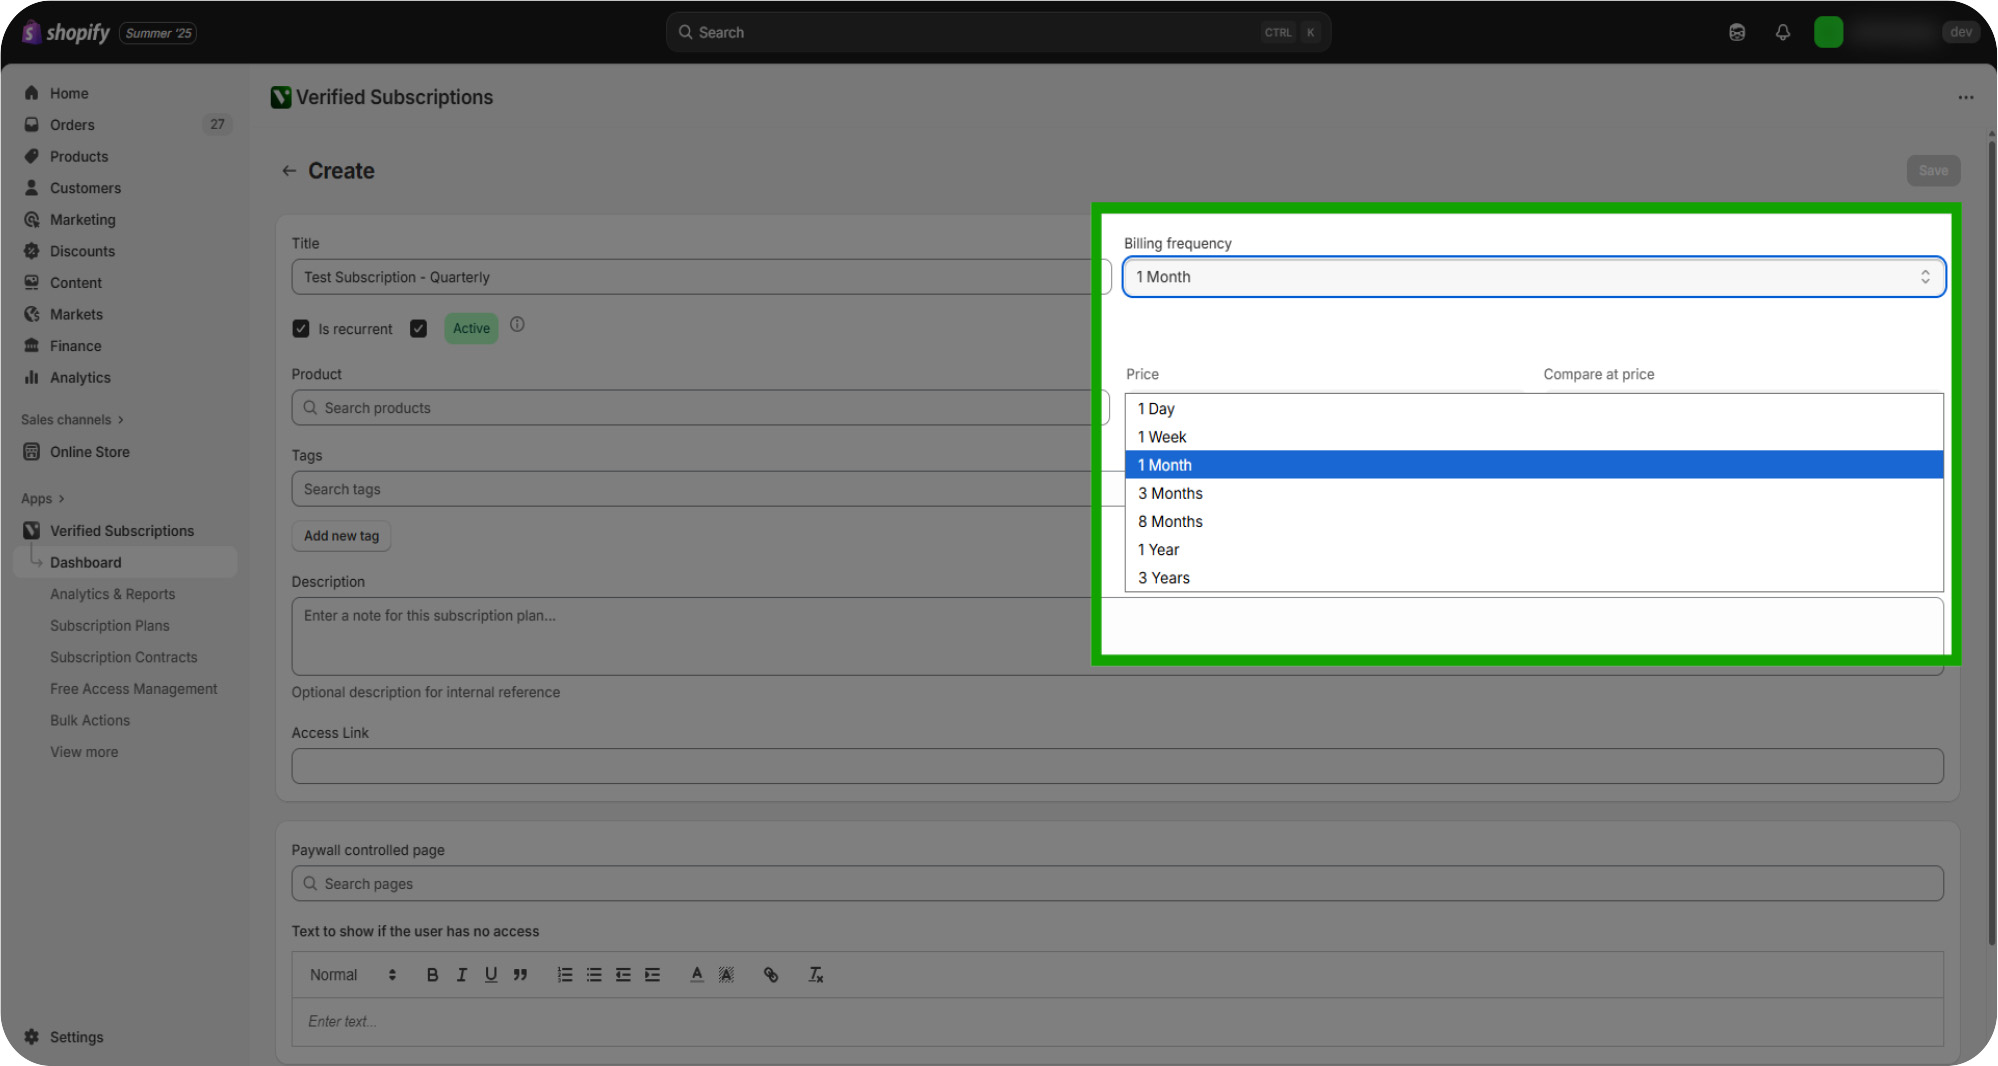
Set Your Billing Term: Choose the billing interval that fits your subscription cycle. If a plan is not Recurrent, the Subscription will end after the term duration specified.
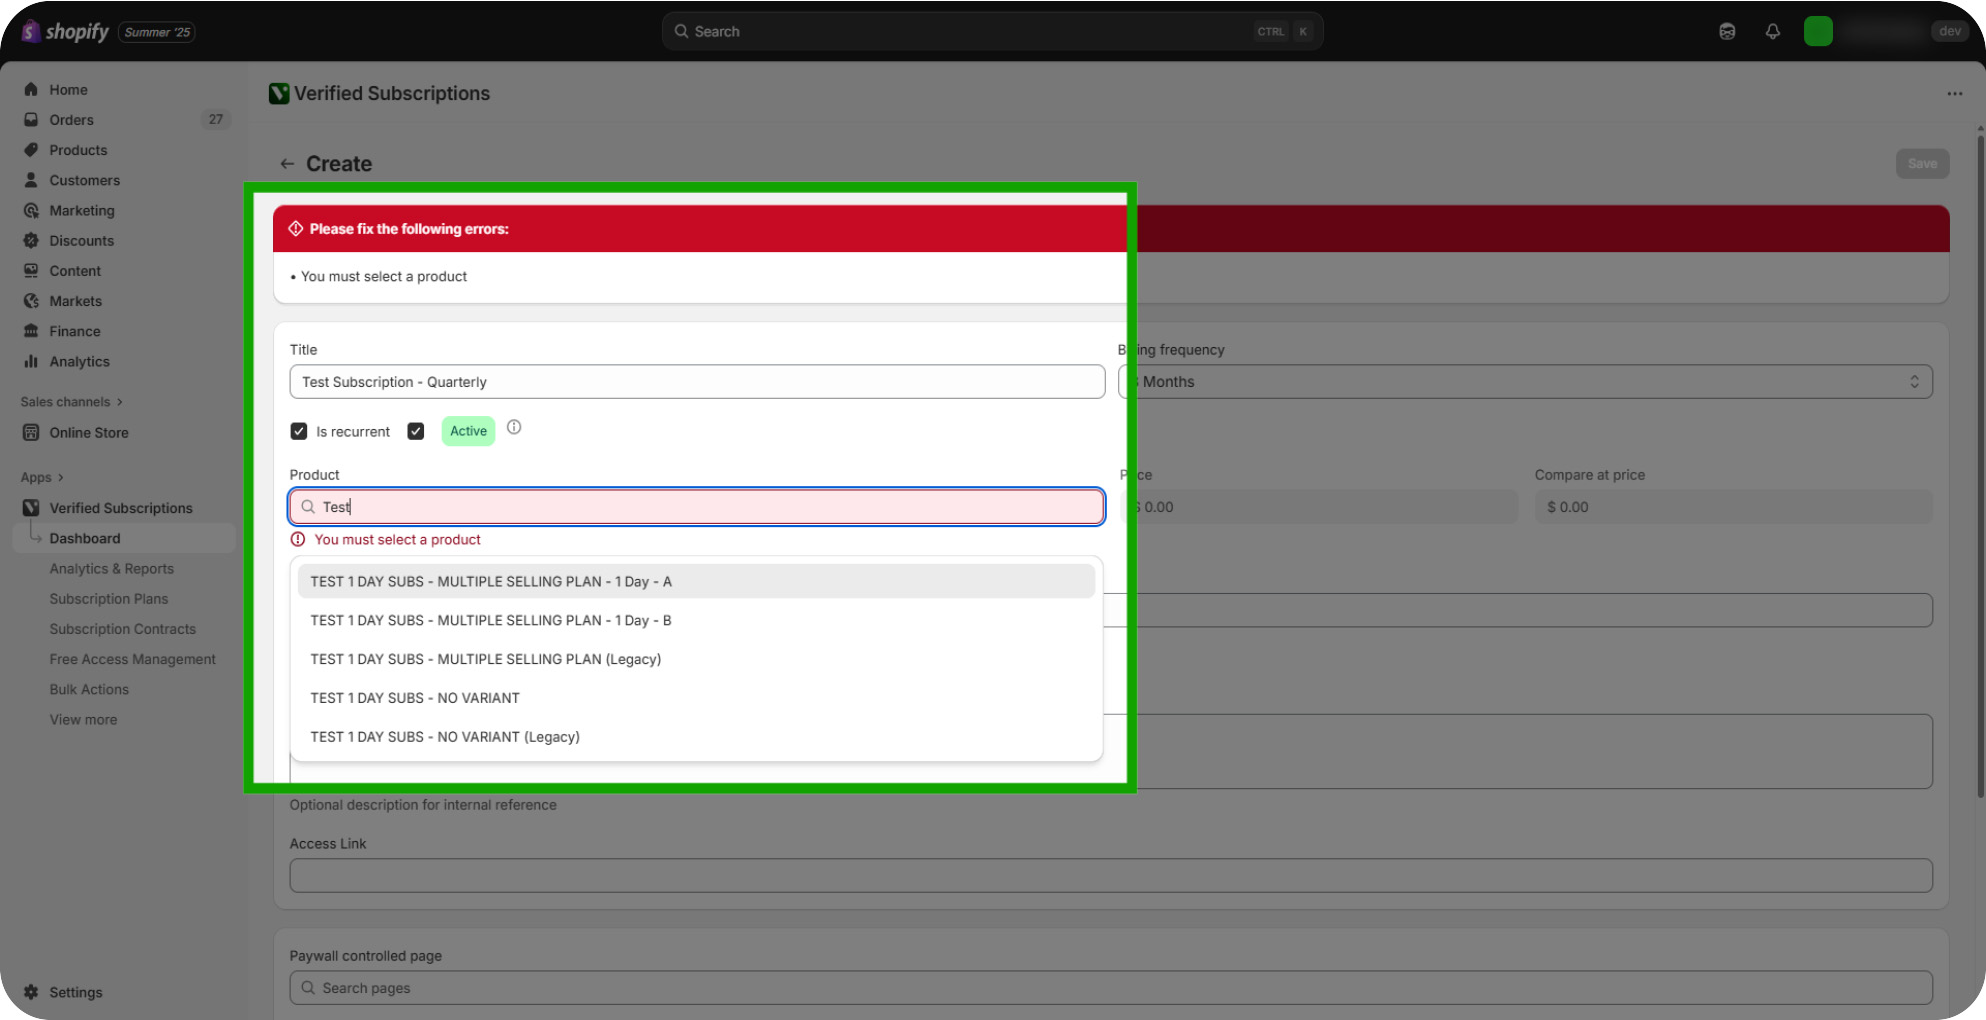
Selecting Your Product: Select the appropriate product that this subscription will apply to. This product must be created via the native "Products" tab in the Shopify storefront. The pricing for your plan is also set via the "Products" tab in Shopify.
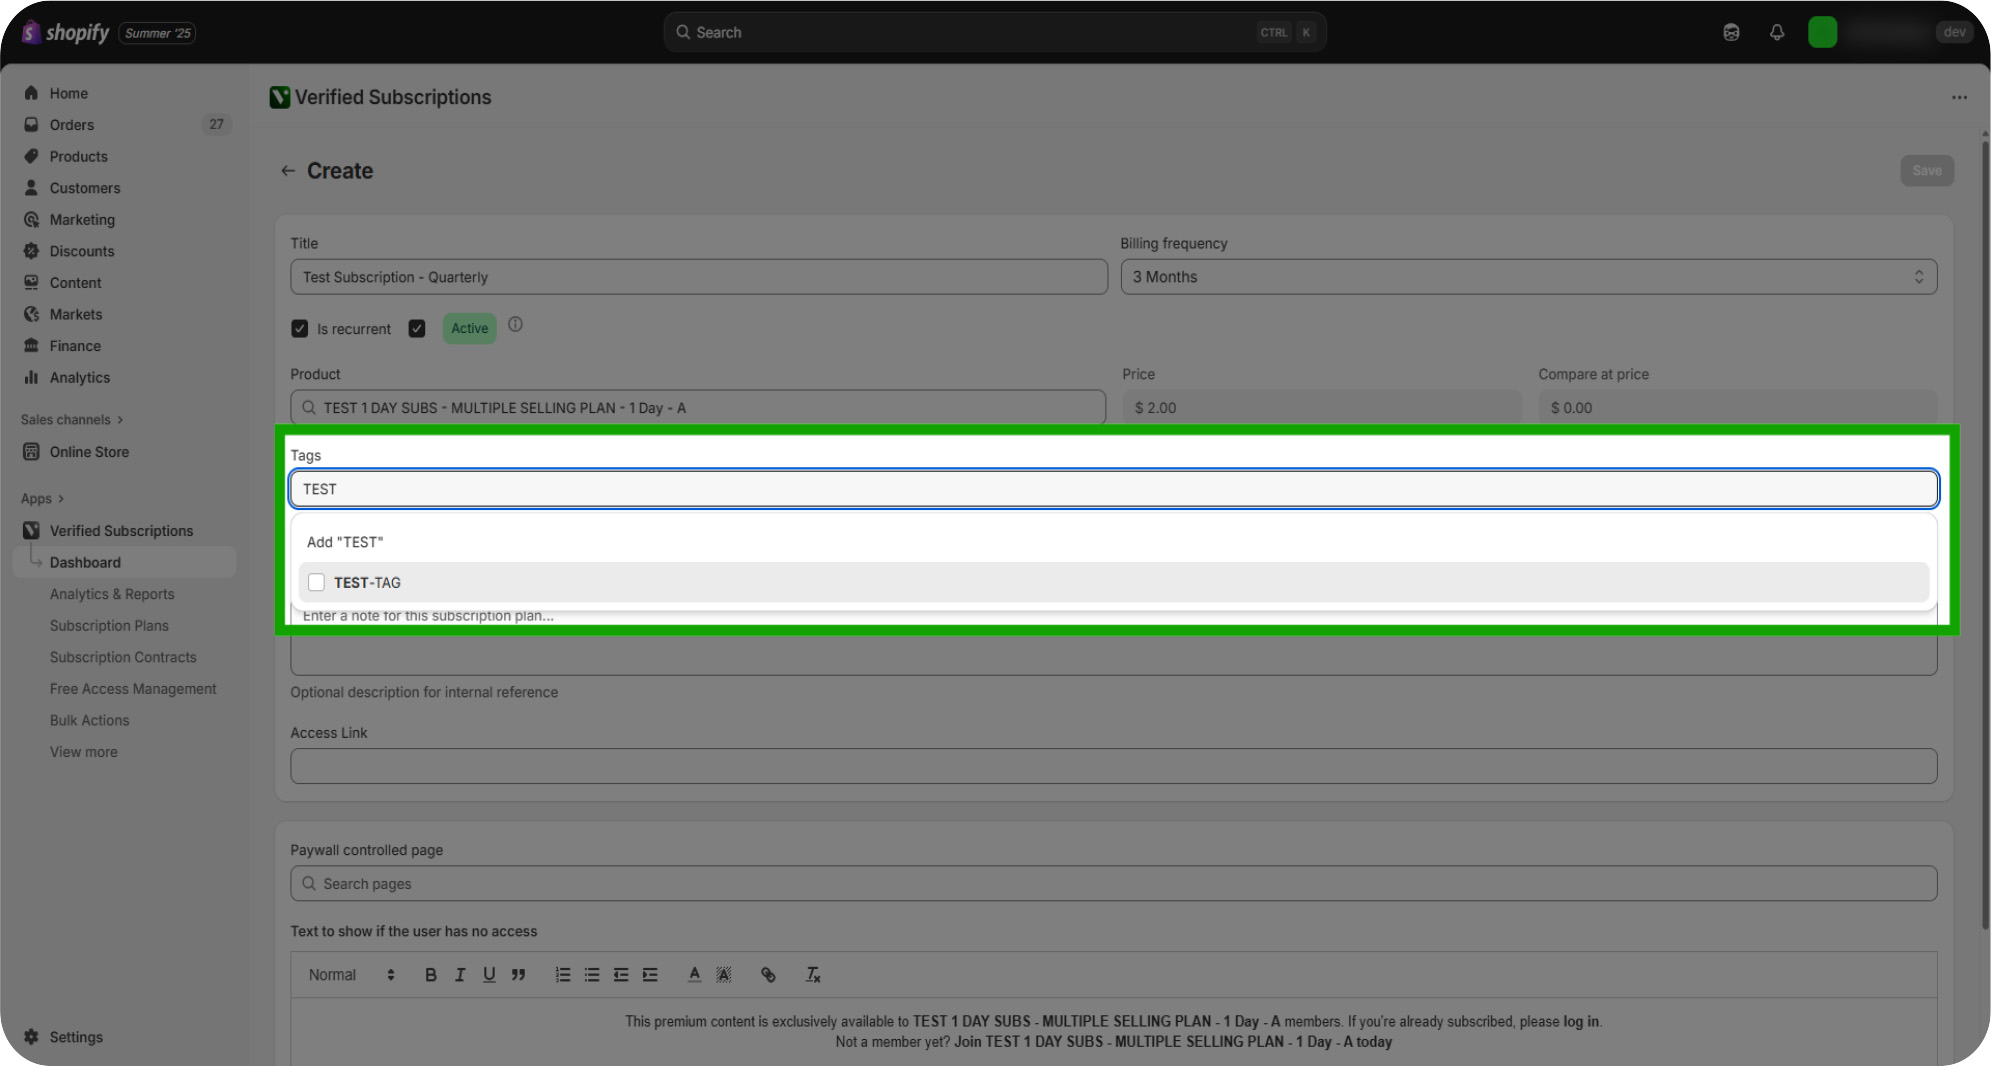
Select A Tag: Choose an existing tag to categorize your subscription. This tag will be assigned to the customer when they purchase this Subscription Plan
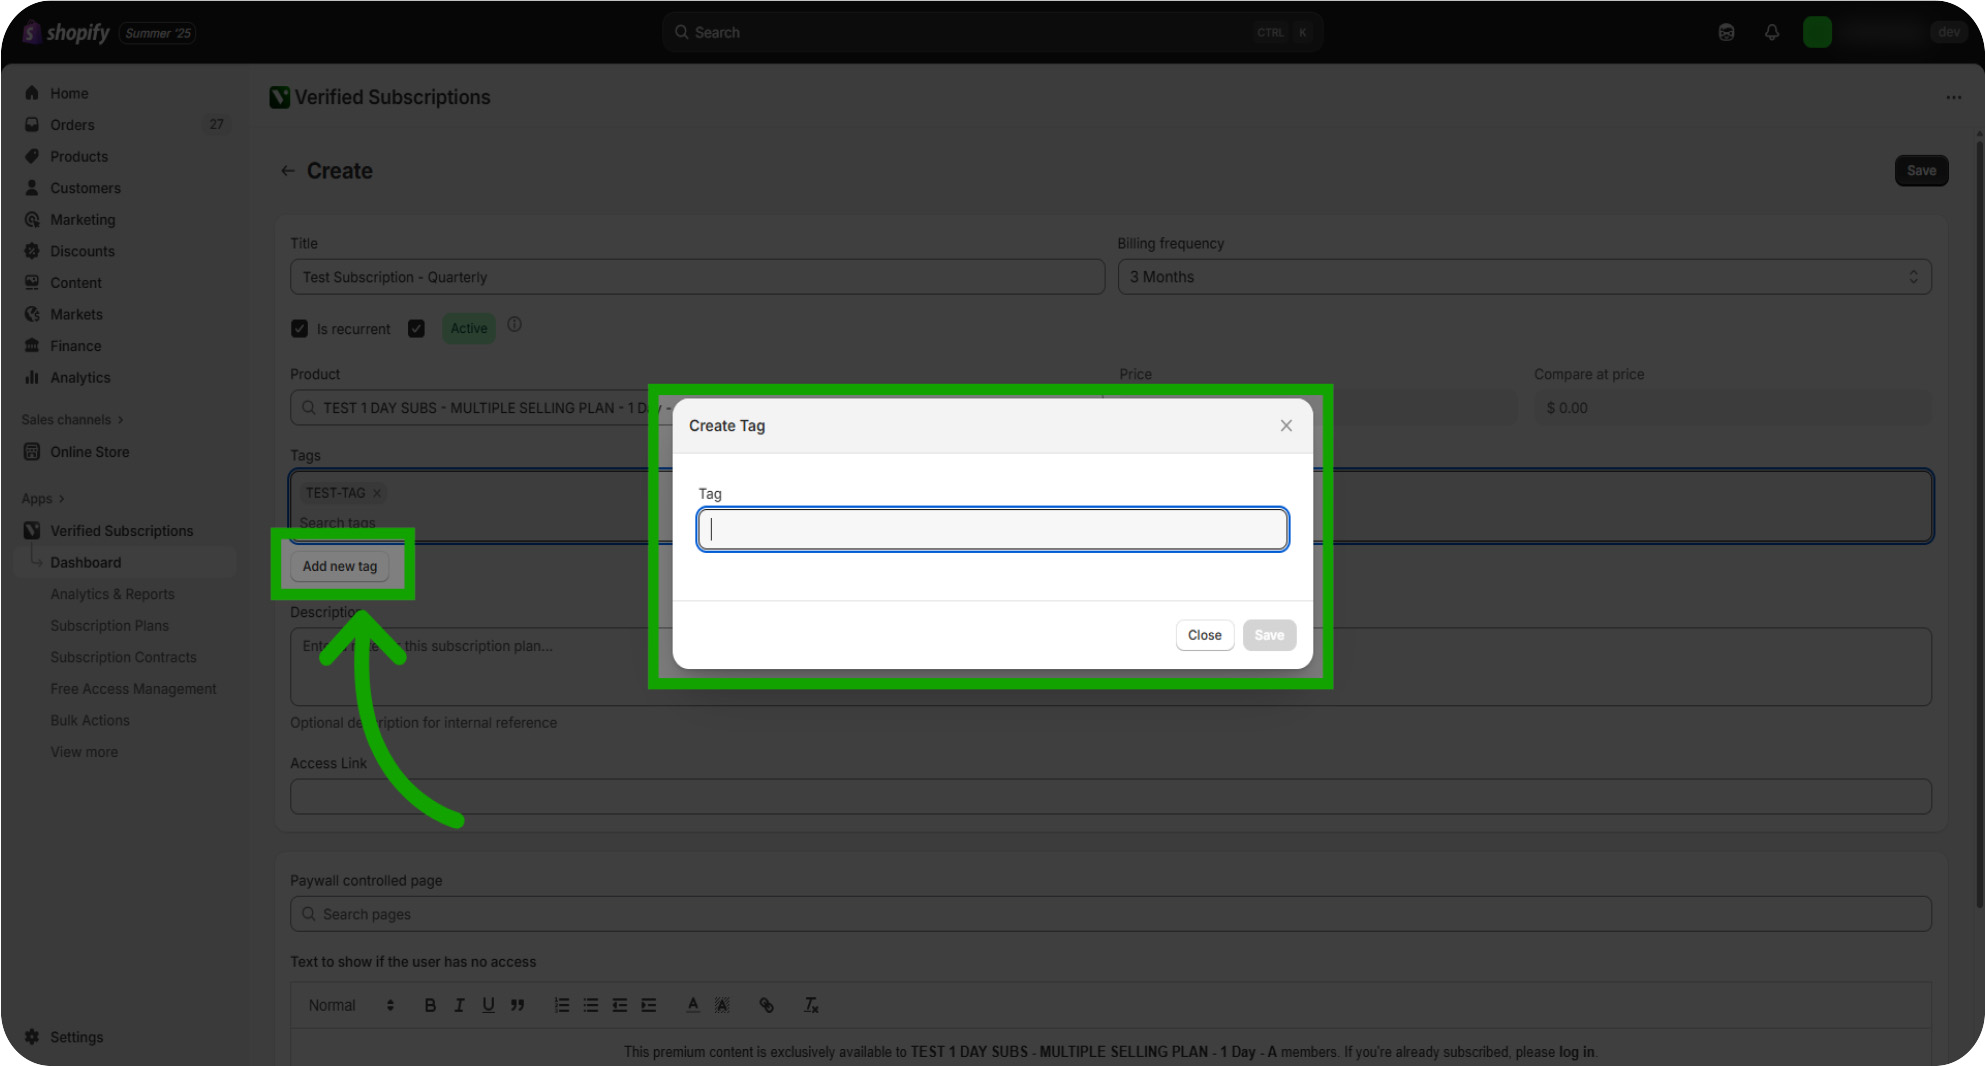
Creating A New Tag: If you don't currently have Tags created, navigate to the "Add New Tag" button to create a new Tag for your Subscription Plan.
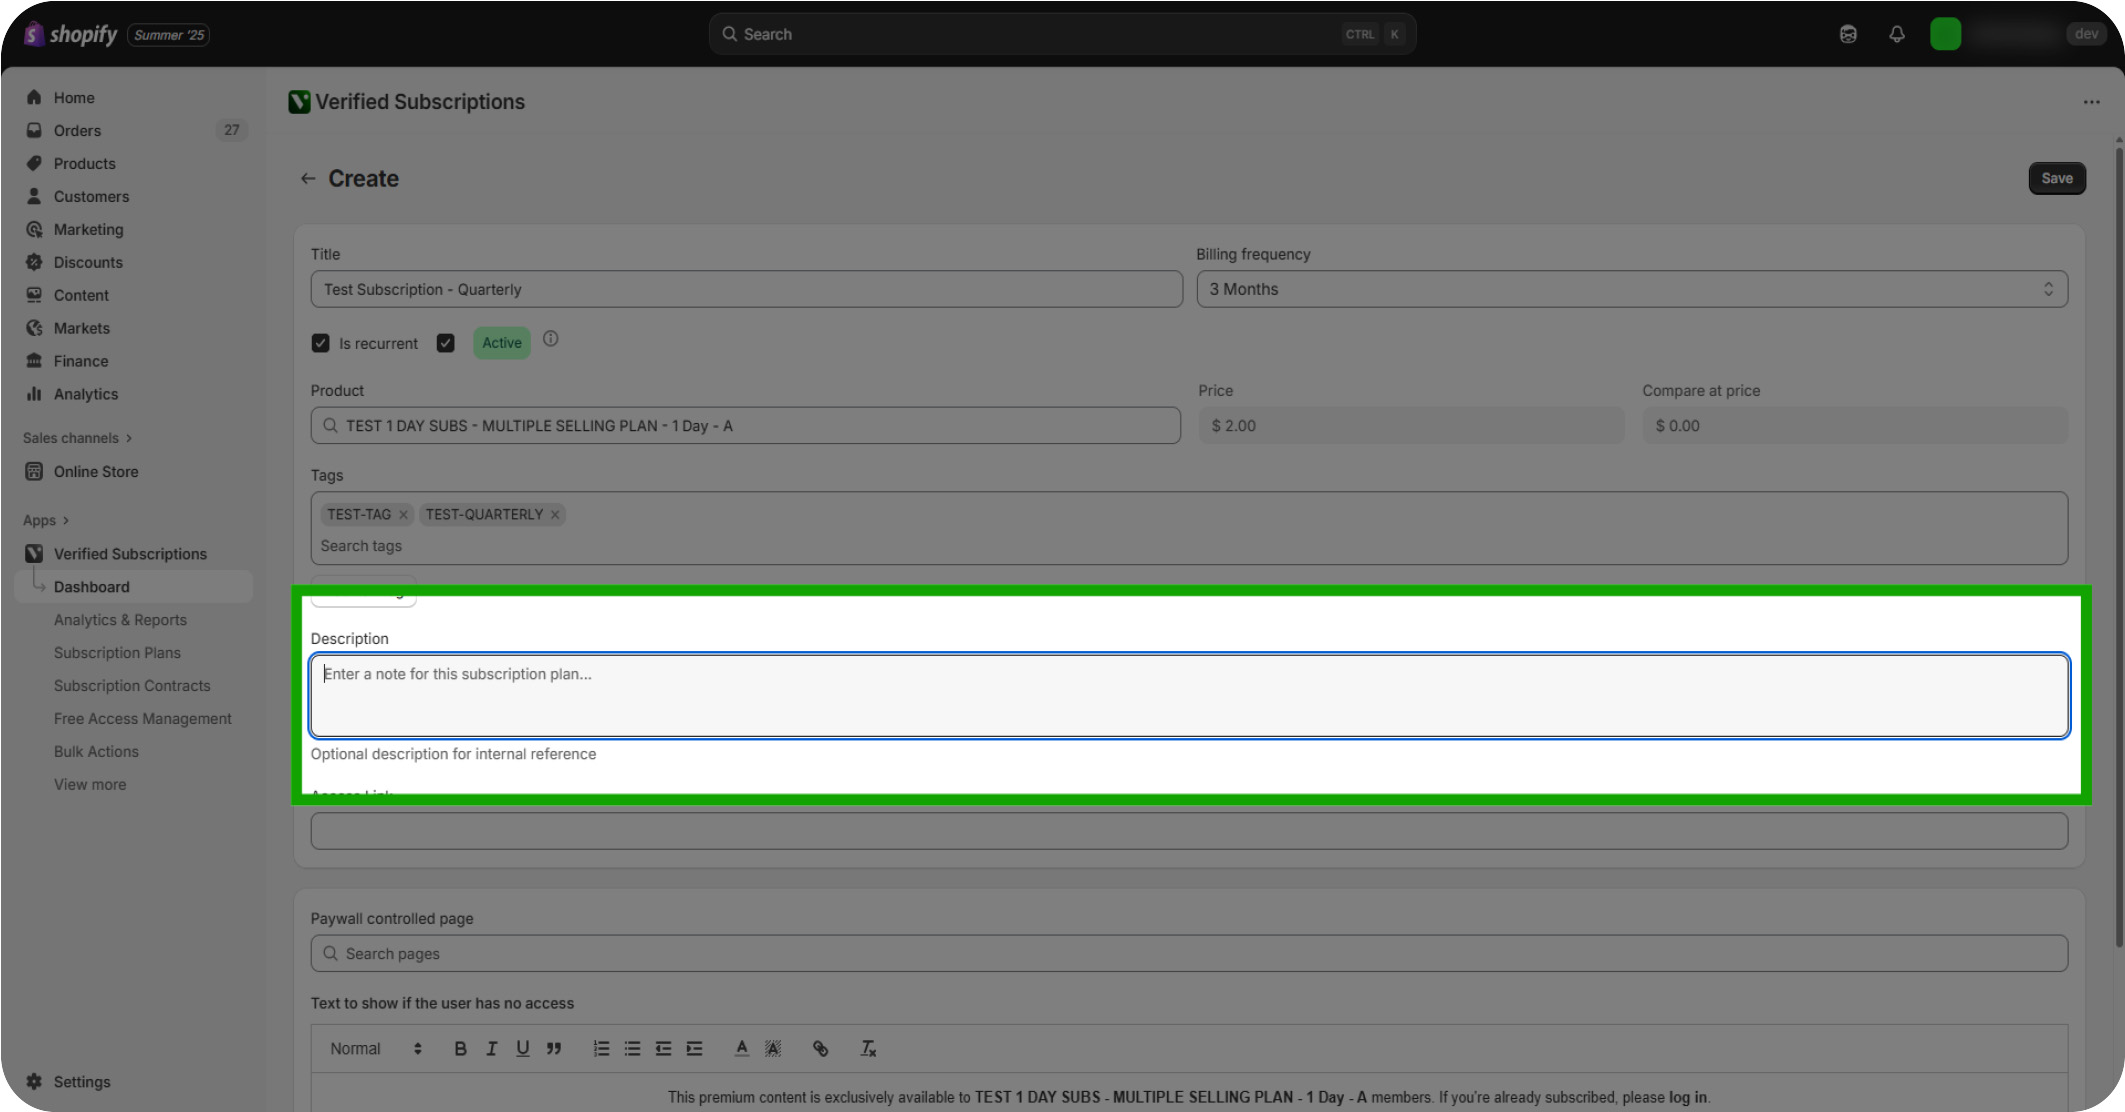
Create a Description For Your Plan: Next, write a concise description explaining the subscription plan and its benefits.
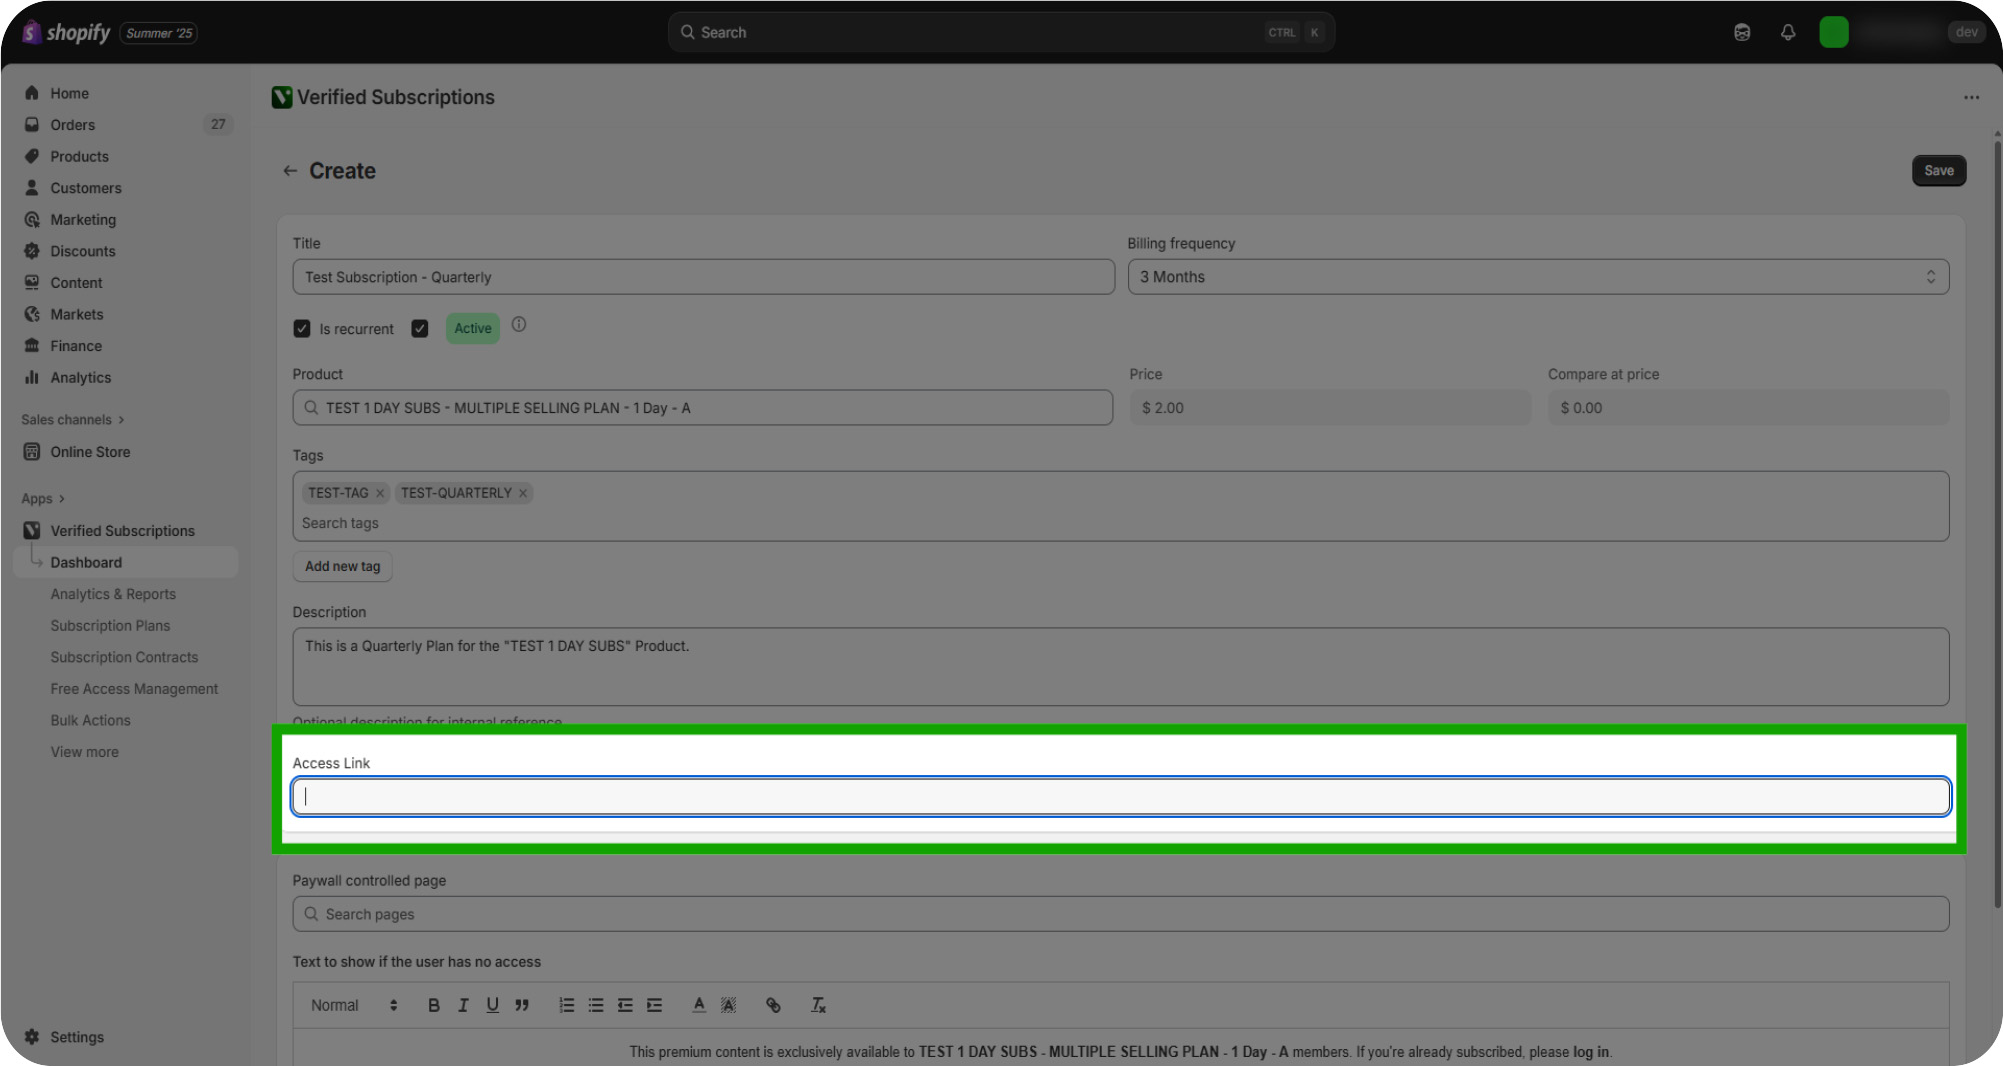
Assigning Access Links: If applicable, the Access Link section allows you to set a URL that you can share to your member to access your Subscription plan.
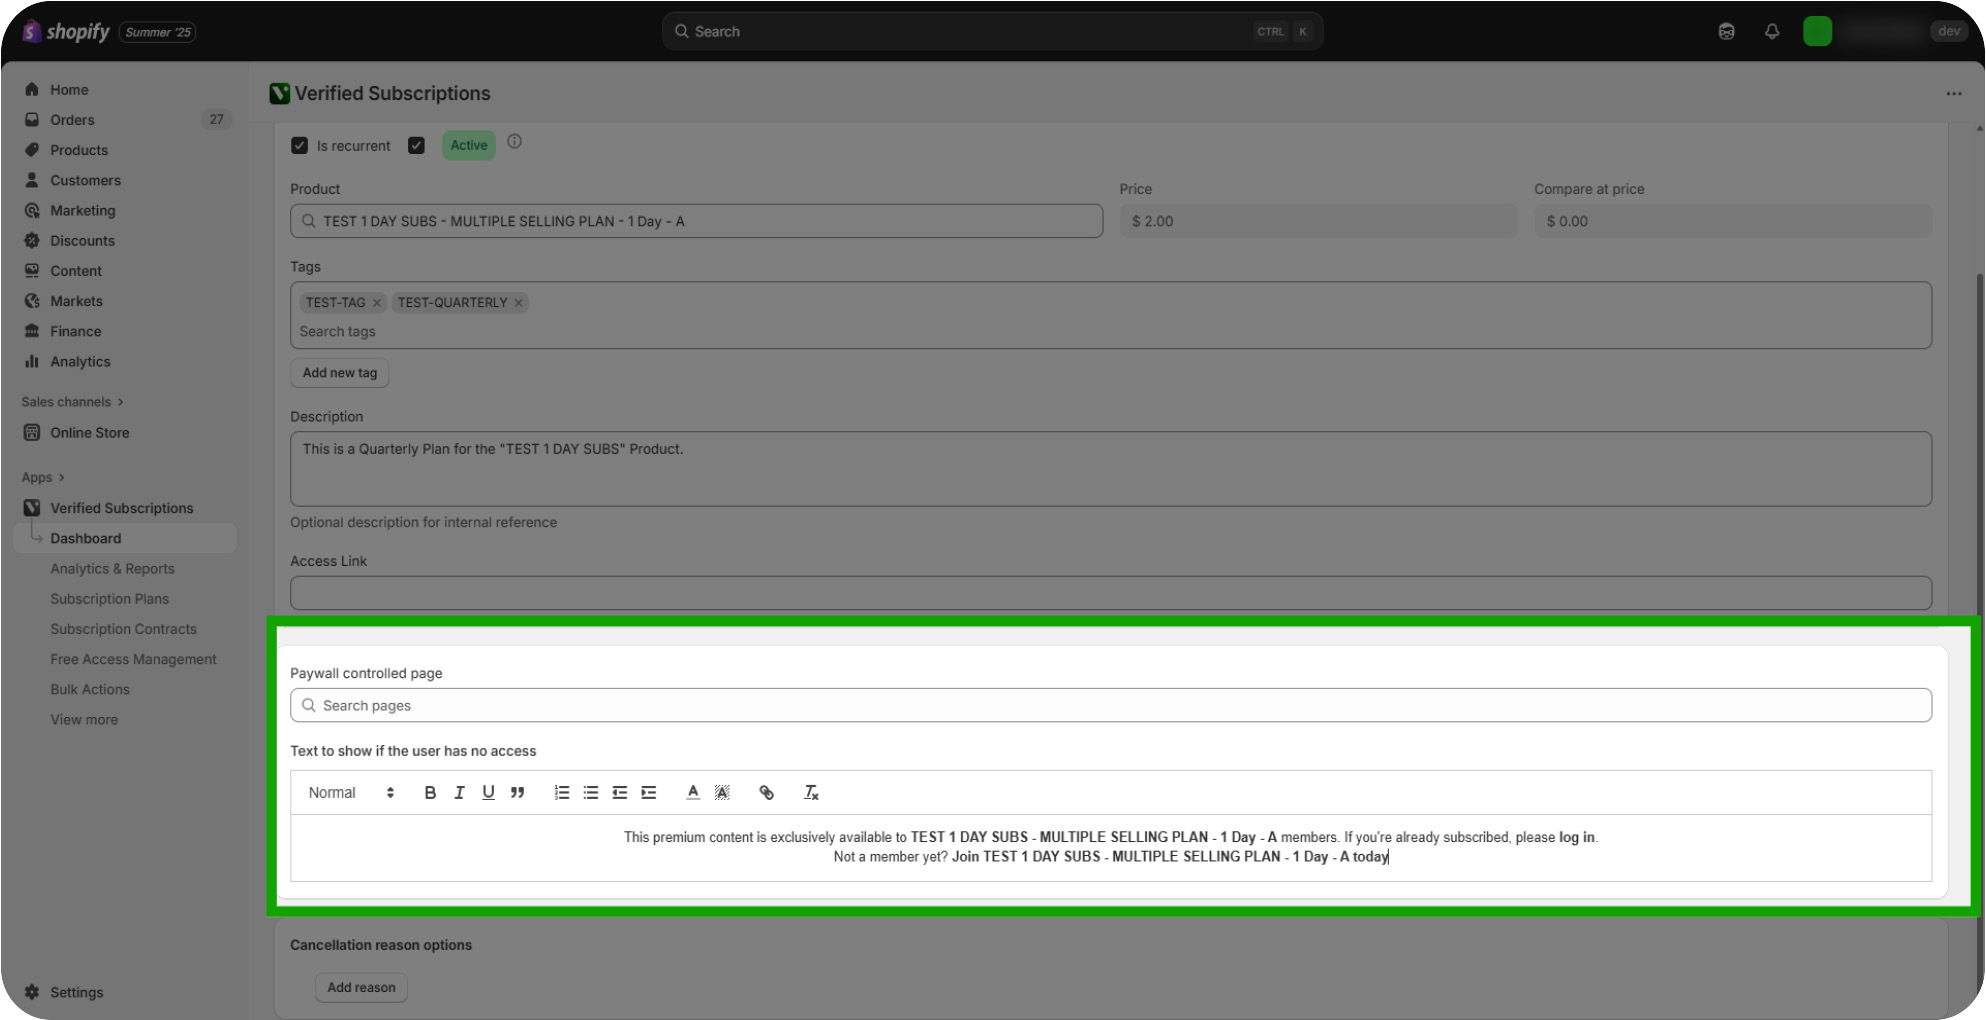
Review Paywall Controlled Pages: If applicable, you can also paywall access to pages on your Shopify storefront to an active Subscription Plan. The content of these pages are managed within your Shopify Online Store settings. You can customize the text displayed for non-Subscribers attempting to access this page here.
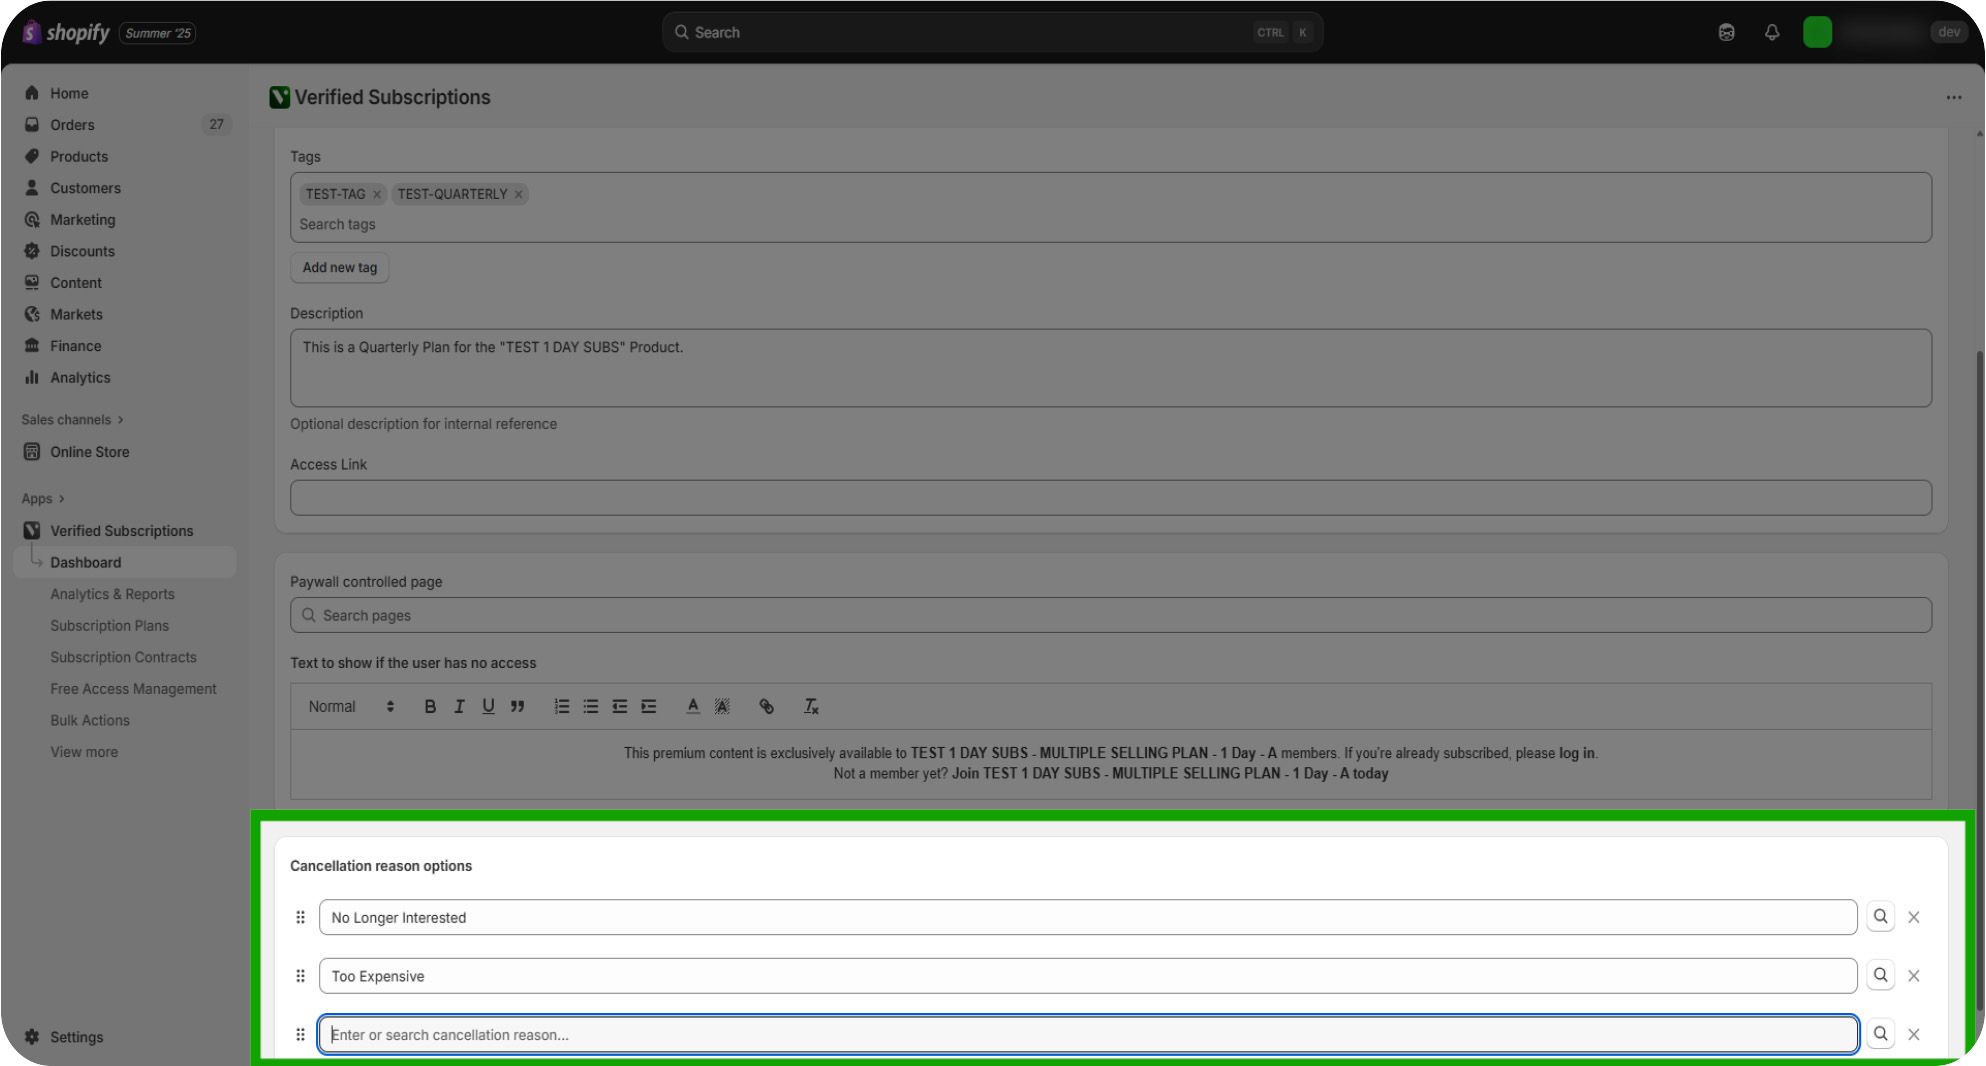
Assigning Cancellation Reasons: If you'd like to track why Customers are cancelling this Subscription, you can define cancellation reasons here.

Assigning Cancellation Reasons Cont.: Each Subscription's cancellation reasons are set individually. These can be reviewed further in the "Cancellations Report" under Analytics & Reports.
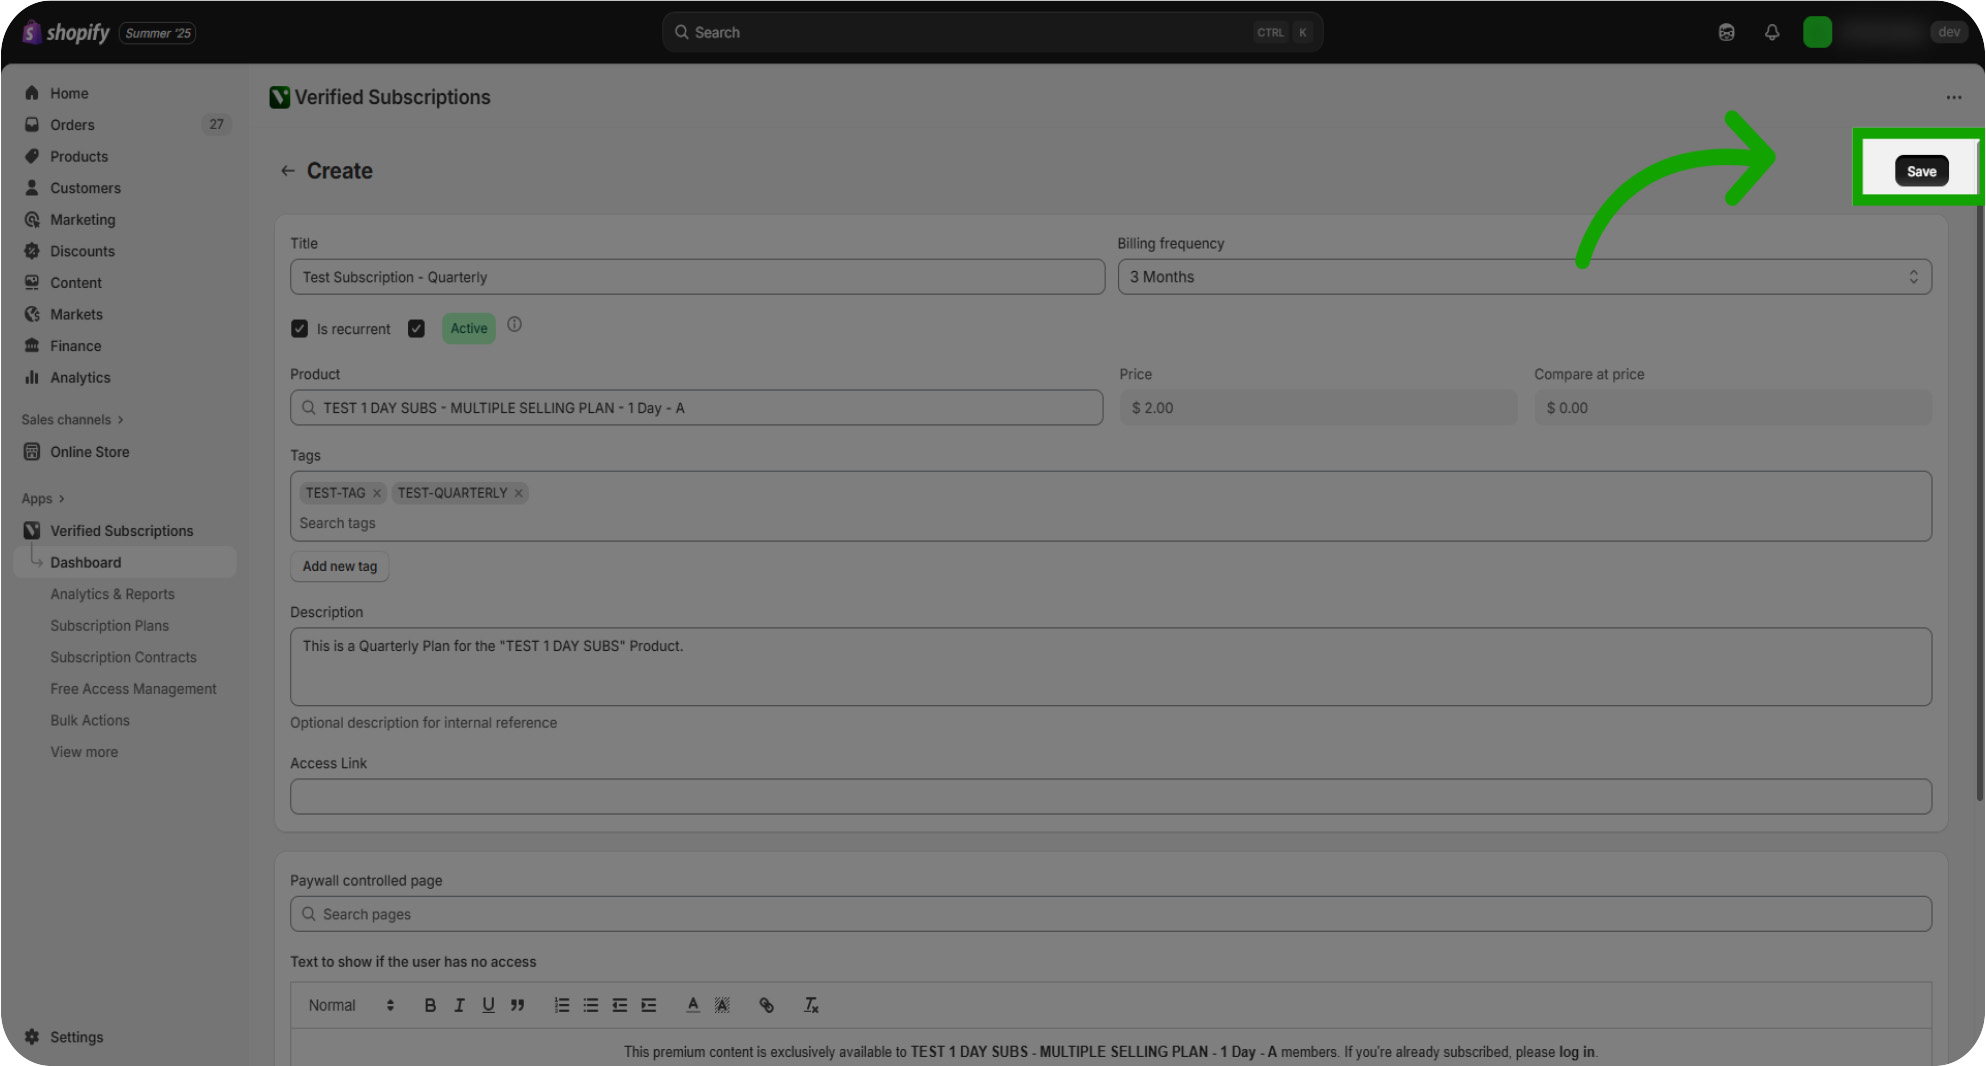
Save Your Subscription Plan: When you're finished, click the "Save" button at the top right of this page to save and finalize your Subscription Plan.