Learn how to utilize Verified Subscriptions Analytics & Reports to gain valuable insights into your subscription business. This guide will help you navigate through subscription data, apply filters, and interpret key metrics for better decision-making.
This guide walked you through accessing and customizing subscription contract analytics in Shopify, including setting date ranges, filtering subscription types, and interpreting revenue and contract billing data to make informed business decisions.
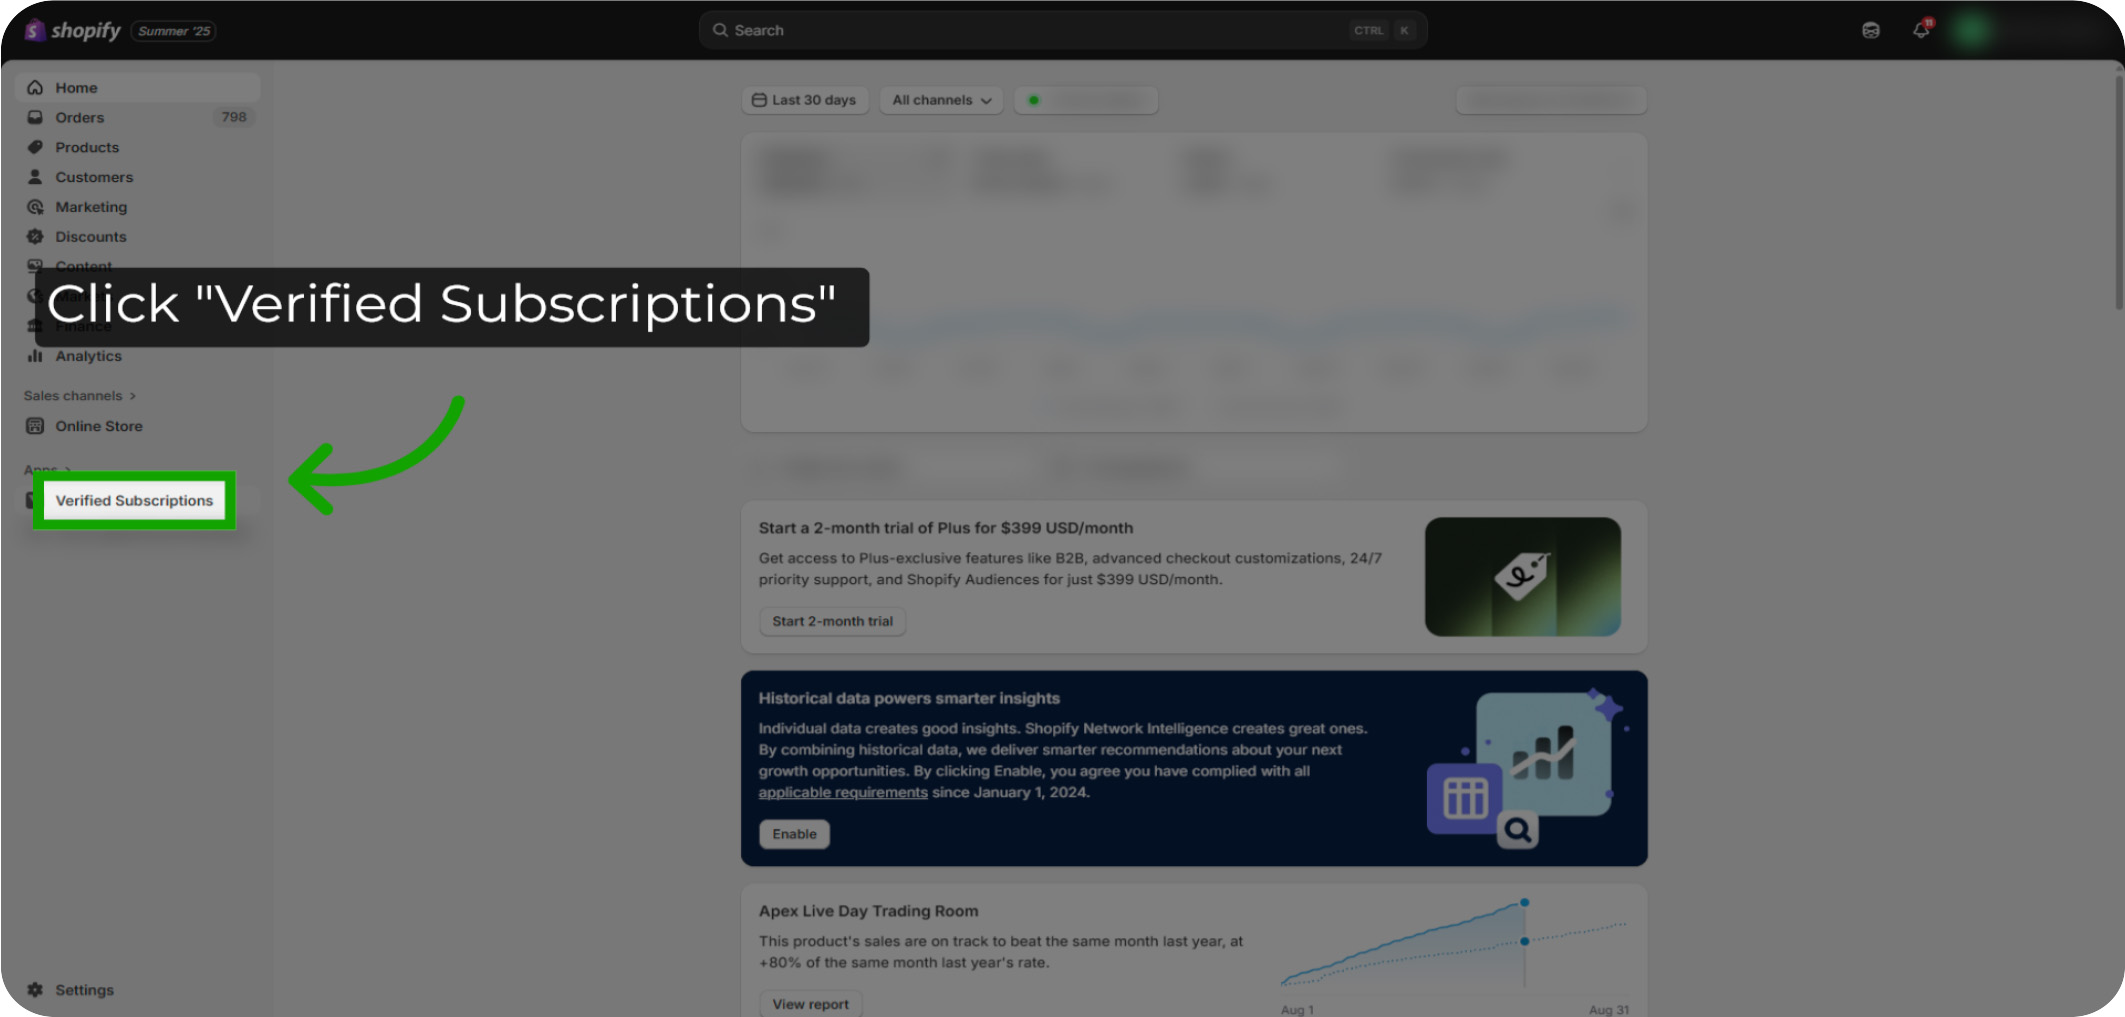
Click "Verified Subscriptions": Select the Verified Subscriptions tab to focus on the subscription details.
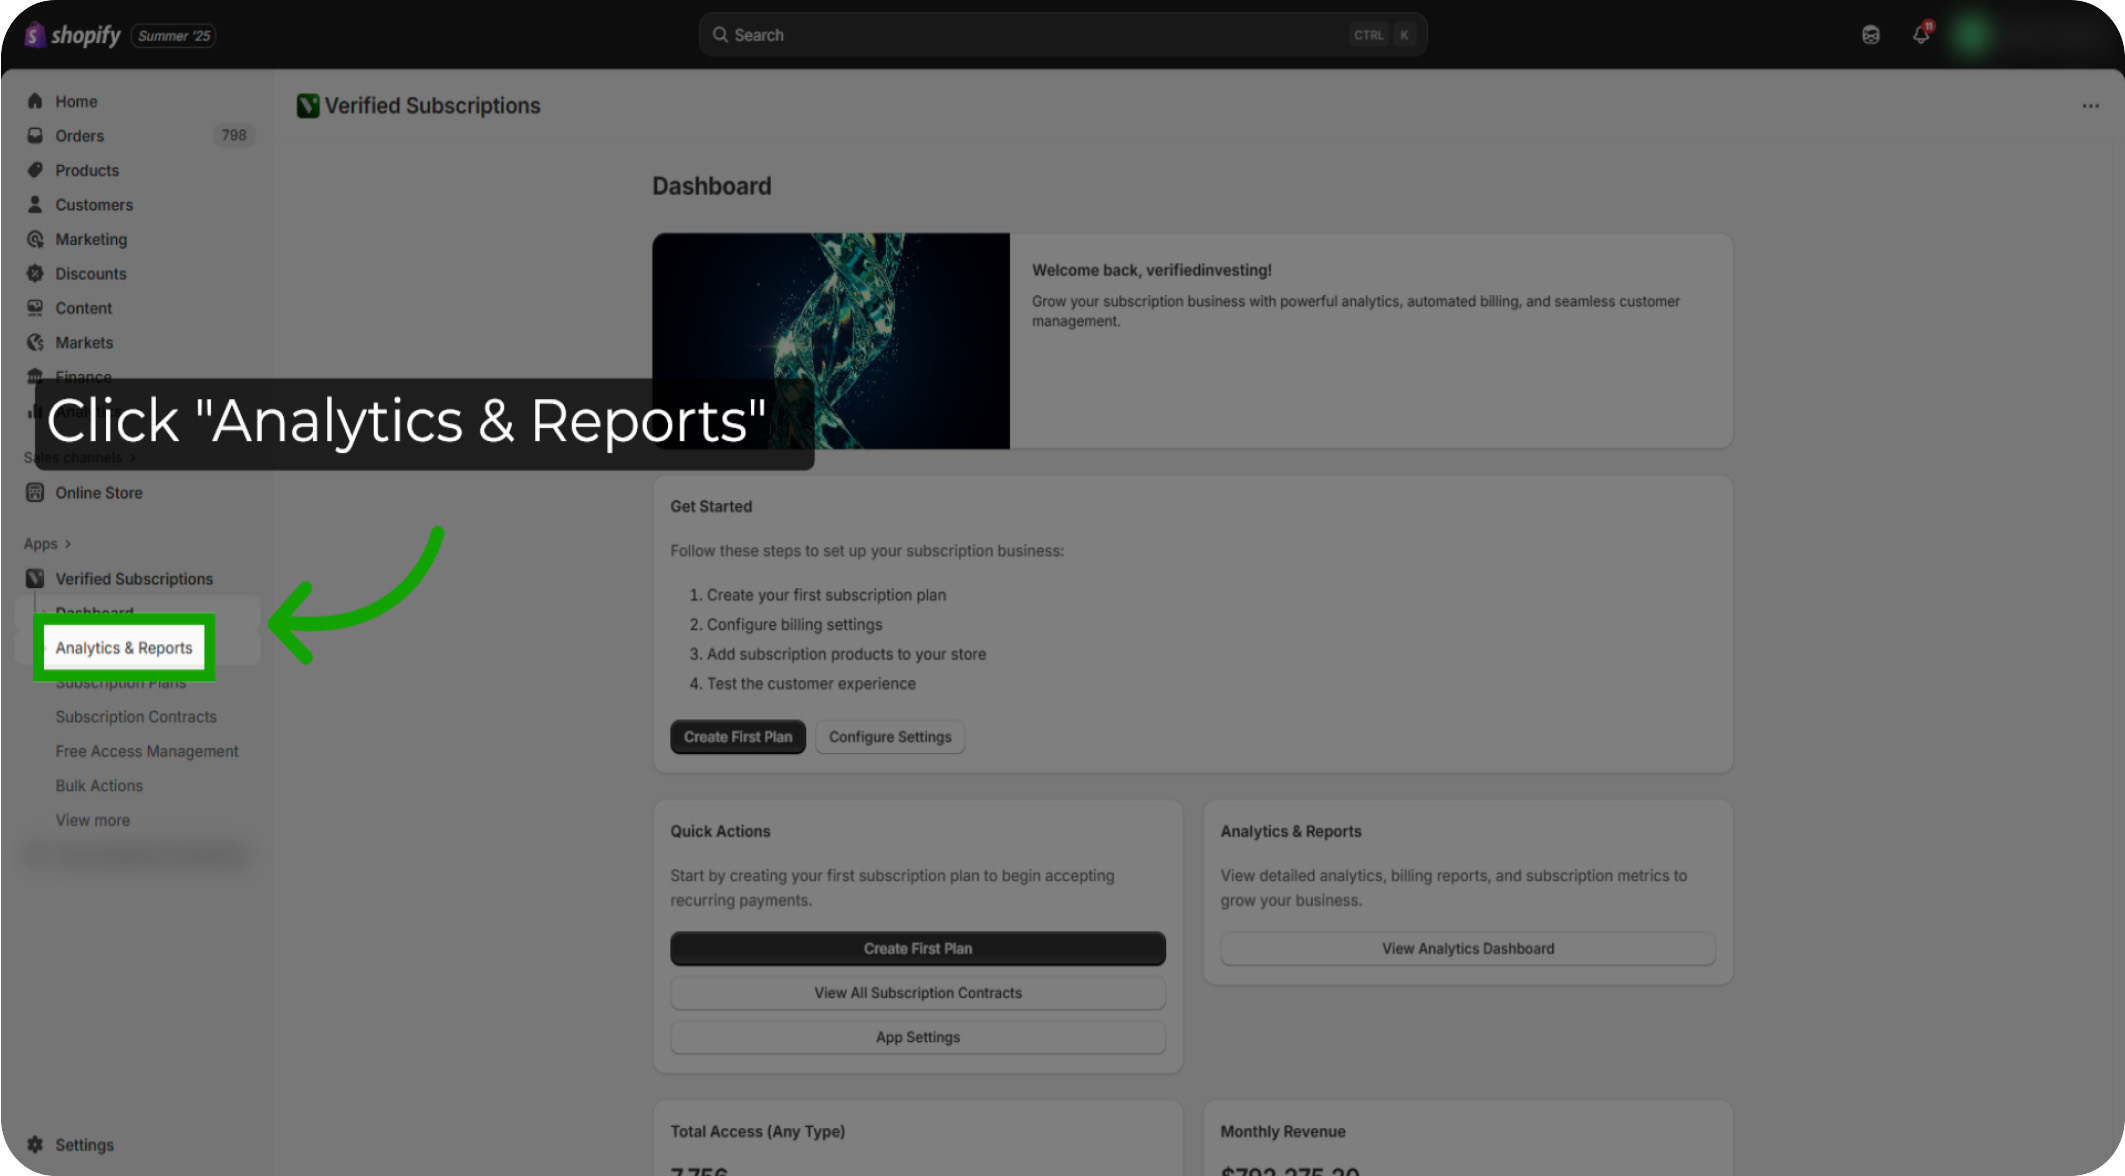
Click "Analytics & Reports": Open the Analytics & Reports section to explore detailed subscription metrics and trends.
Click "Deselect All": Begin by opening the subscription plans filter and deselect all current selections to start fresh. This will allow you to filter down to a specific subscription or all subscriptions.
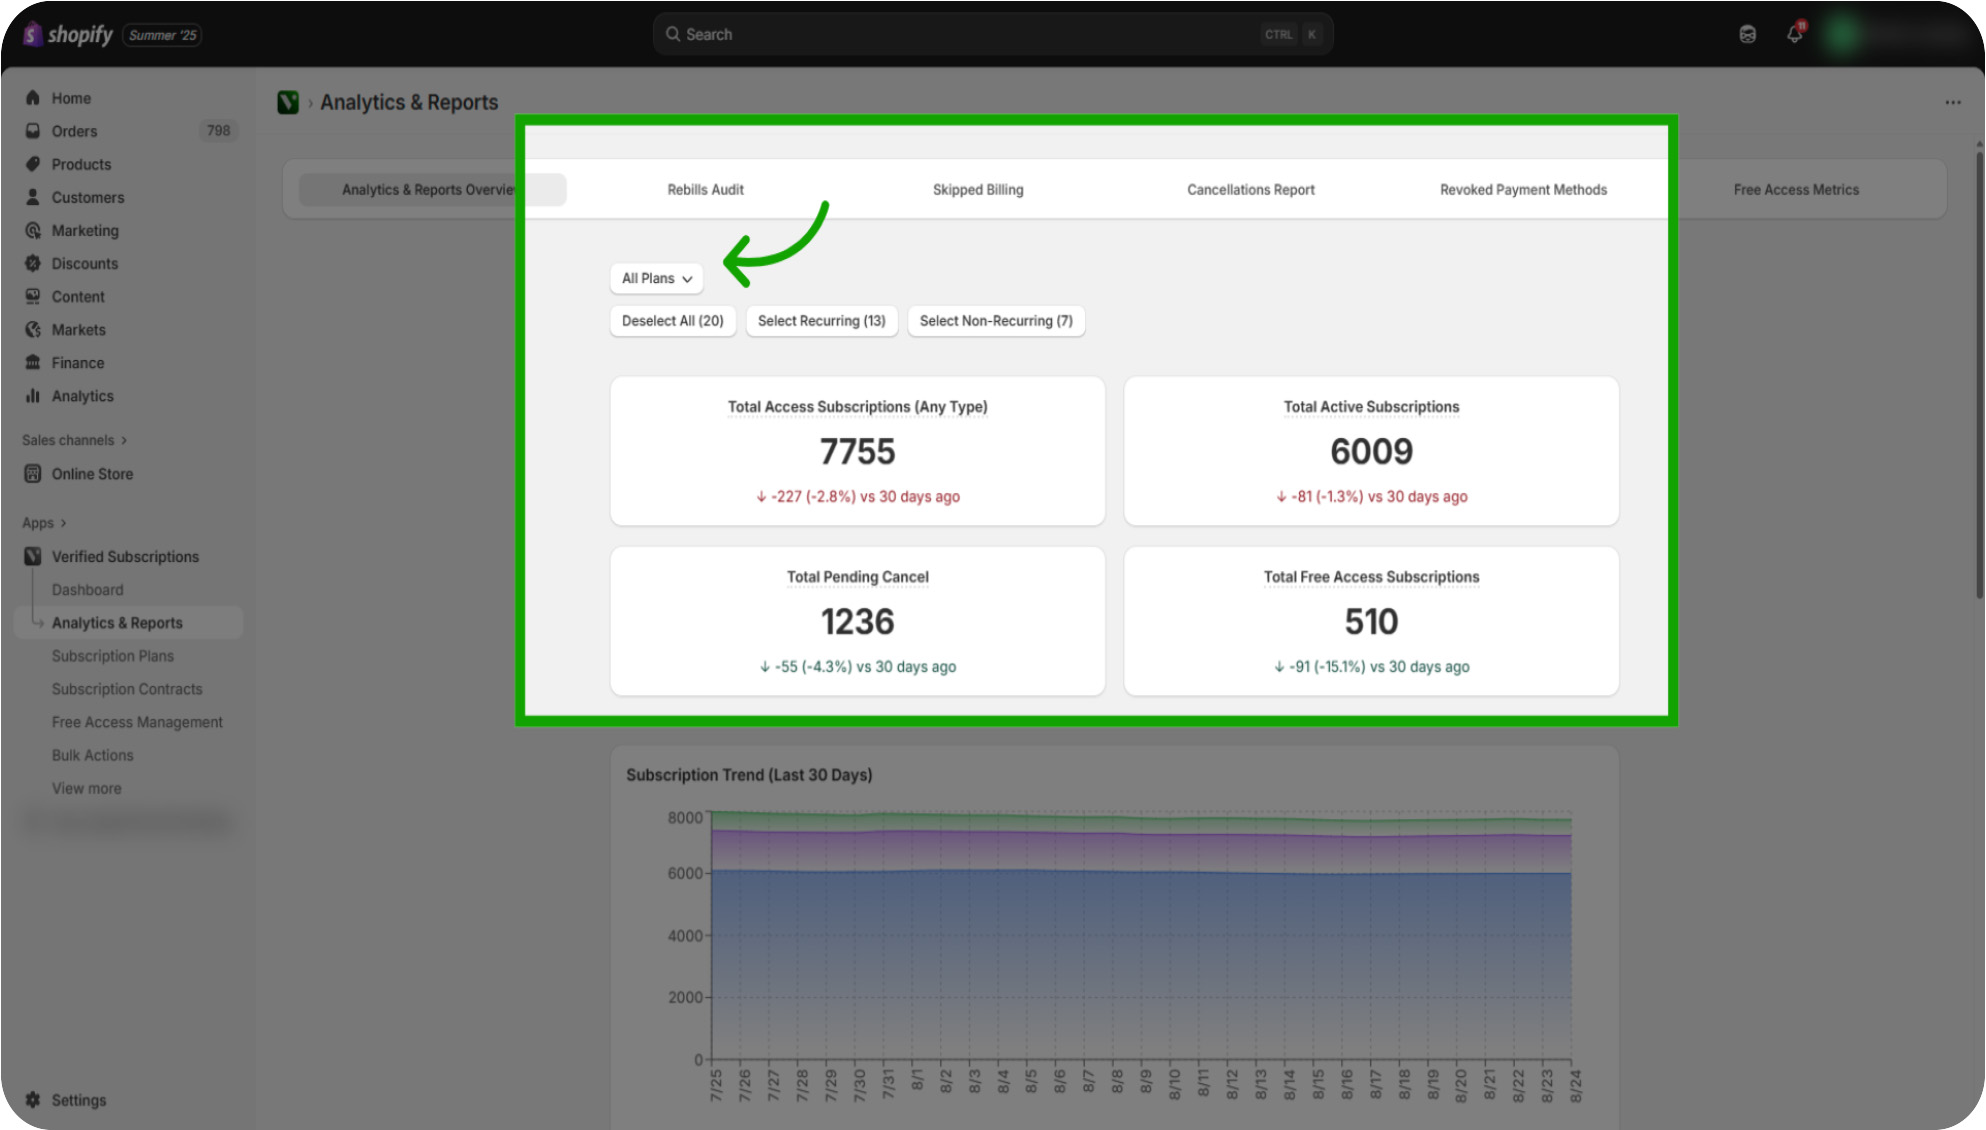
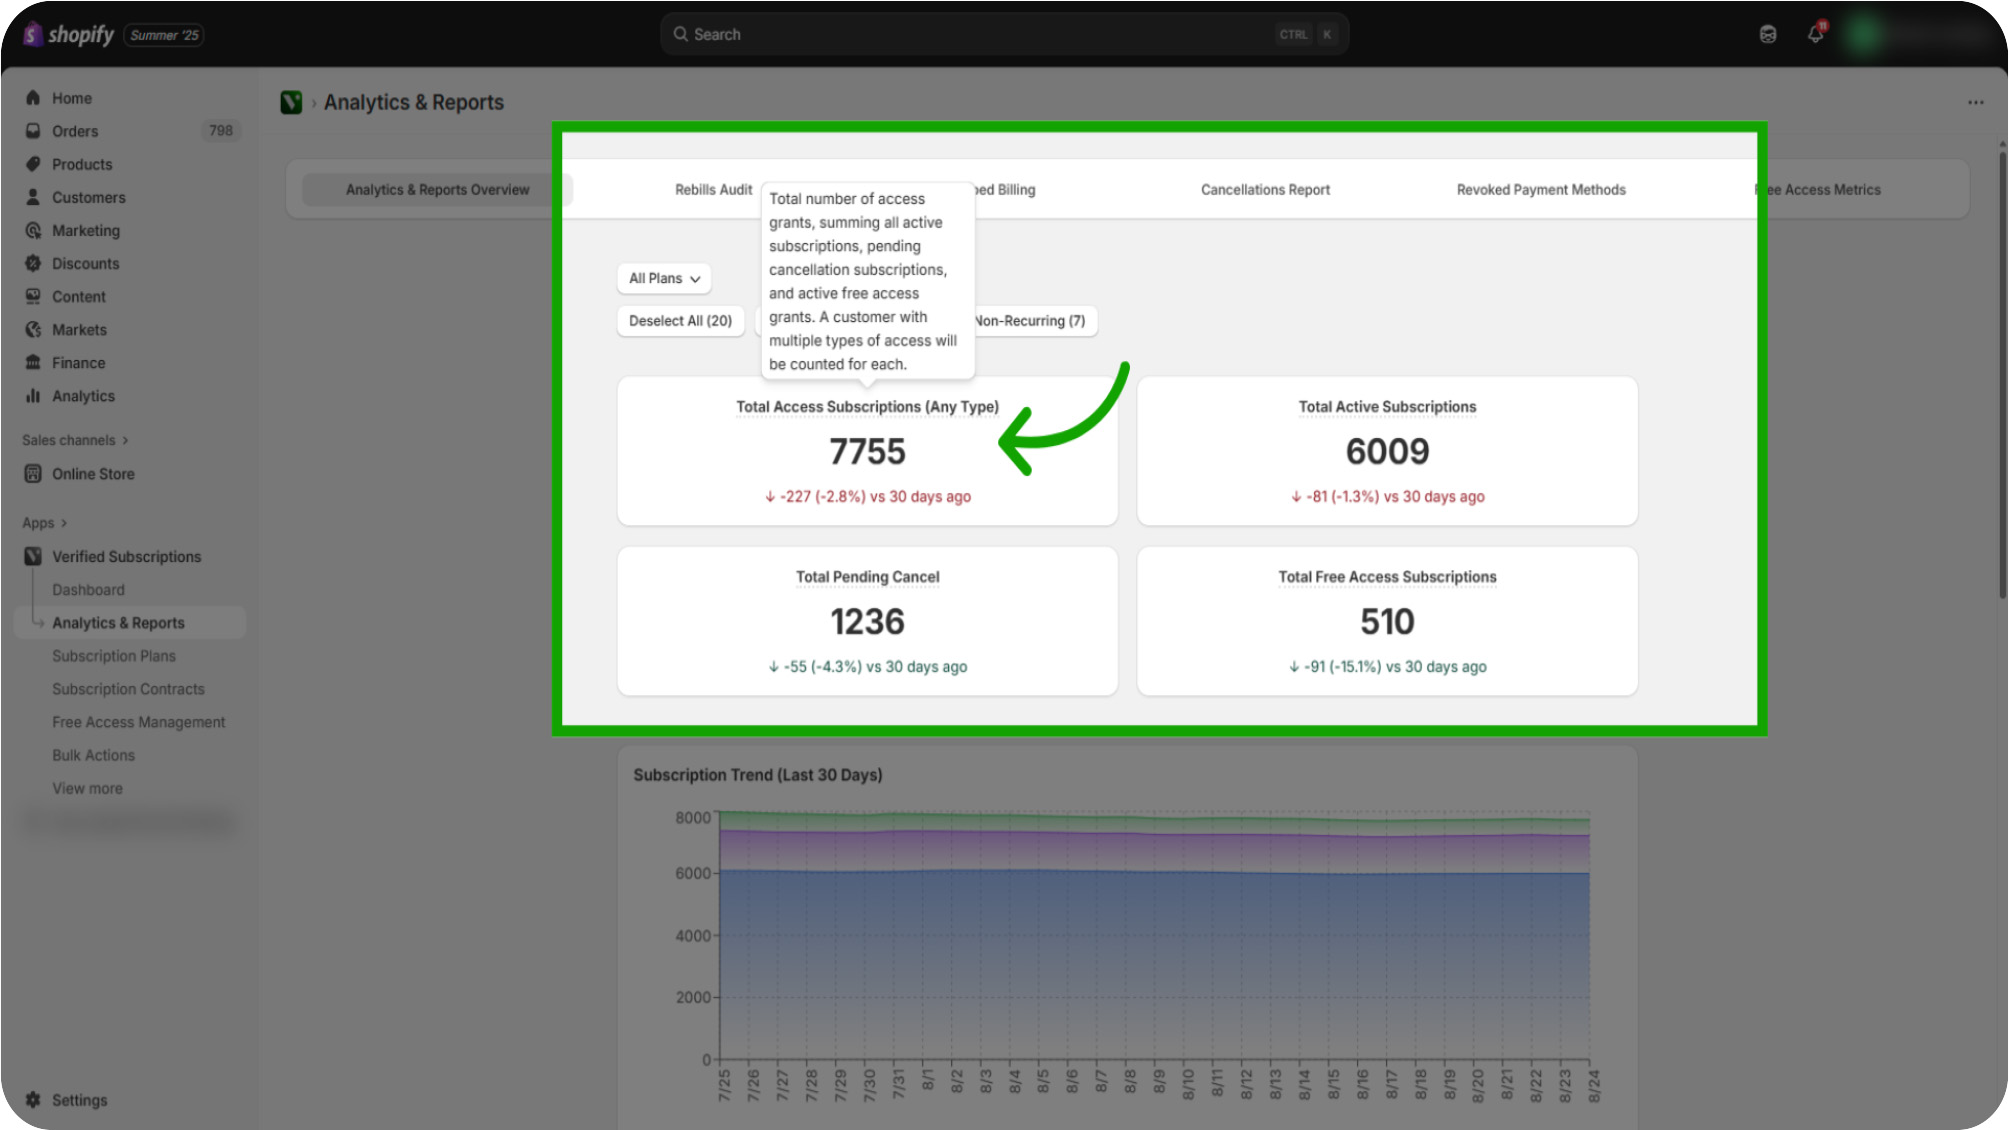
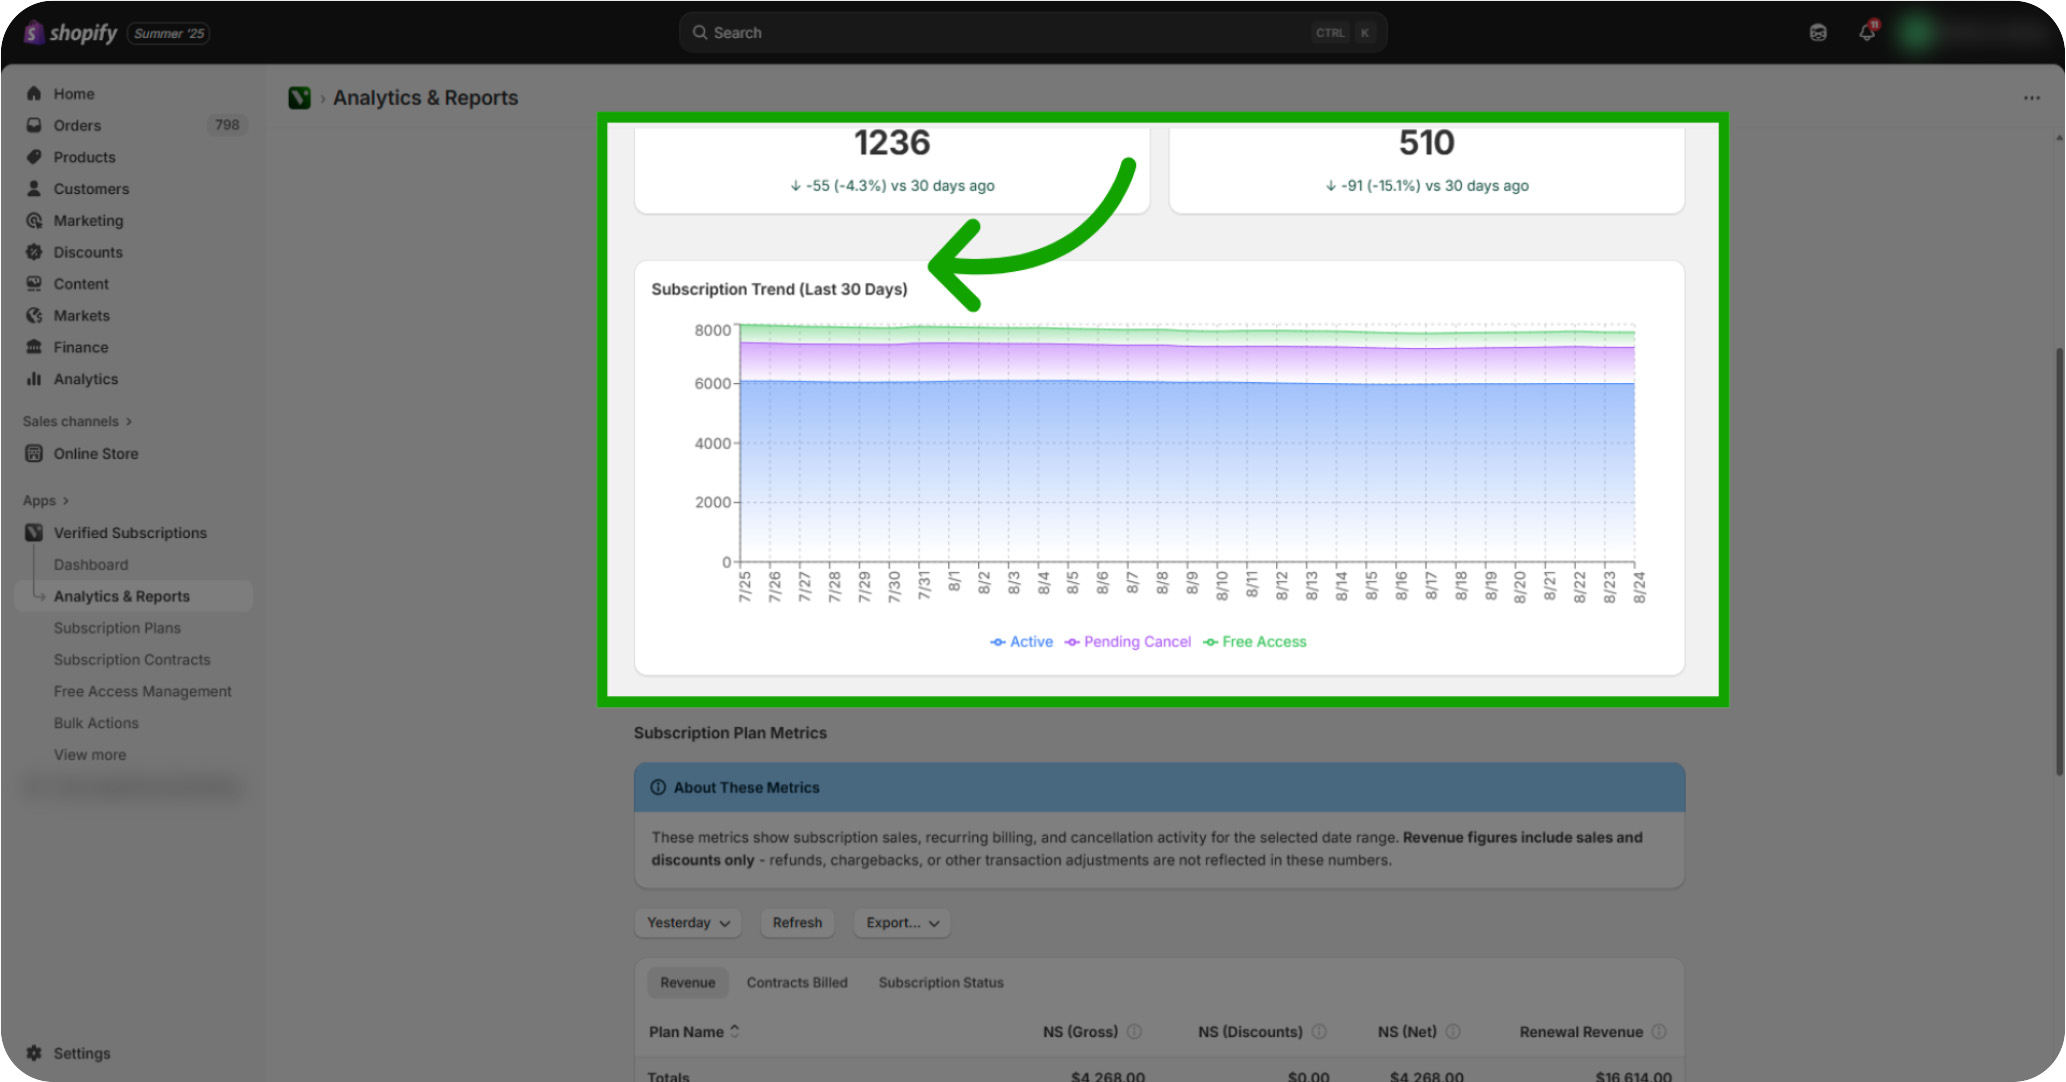
Review "Total Access Subscriptions (Any Type)": The Total Access Subscriptions section will allow you to review the overall subscription contracts and recent changes.
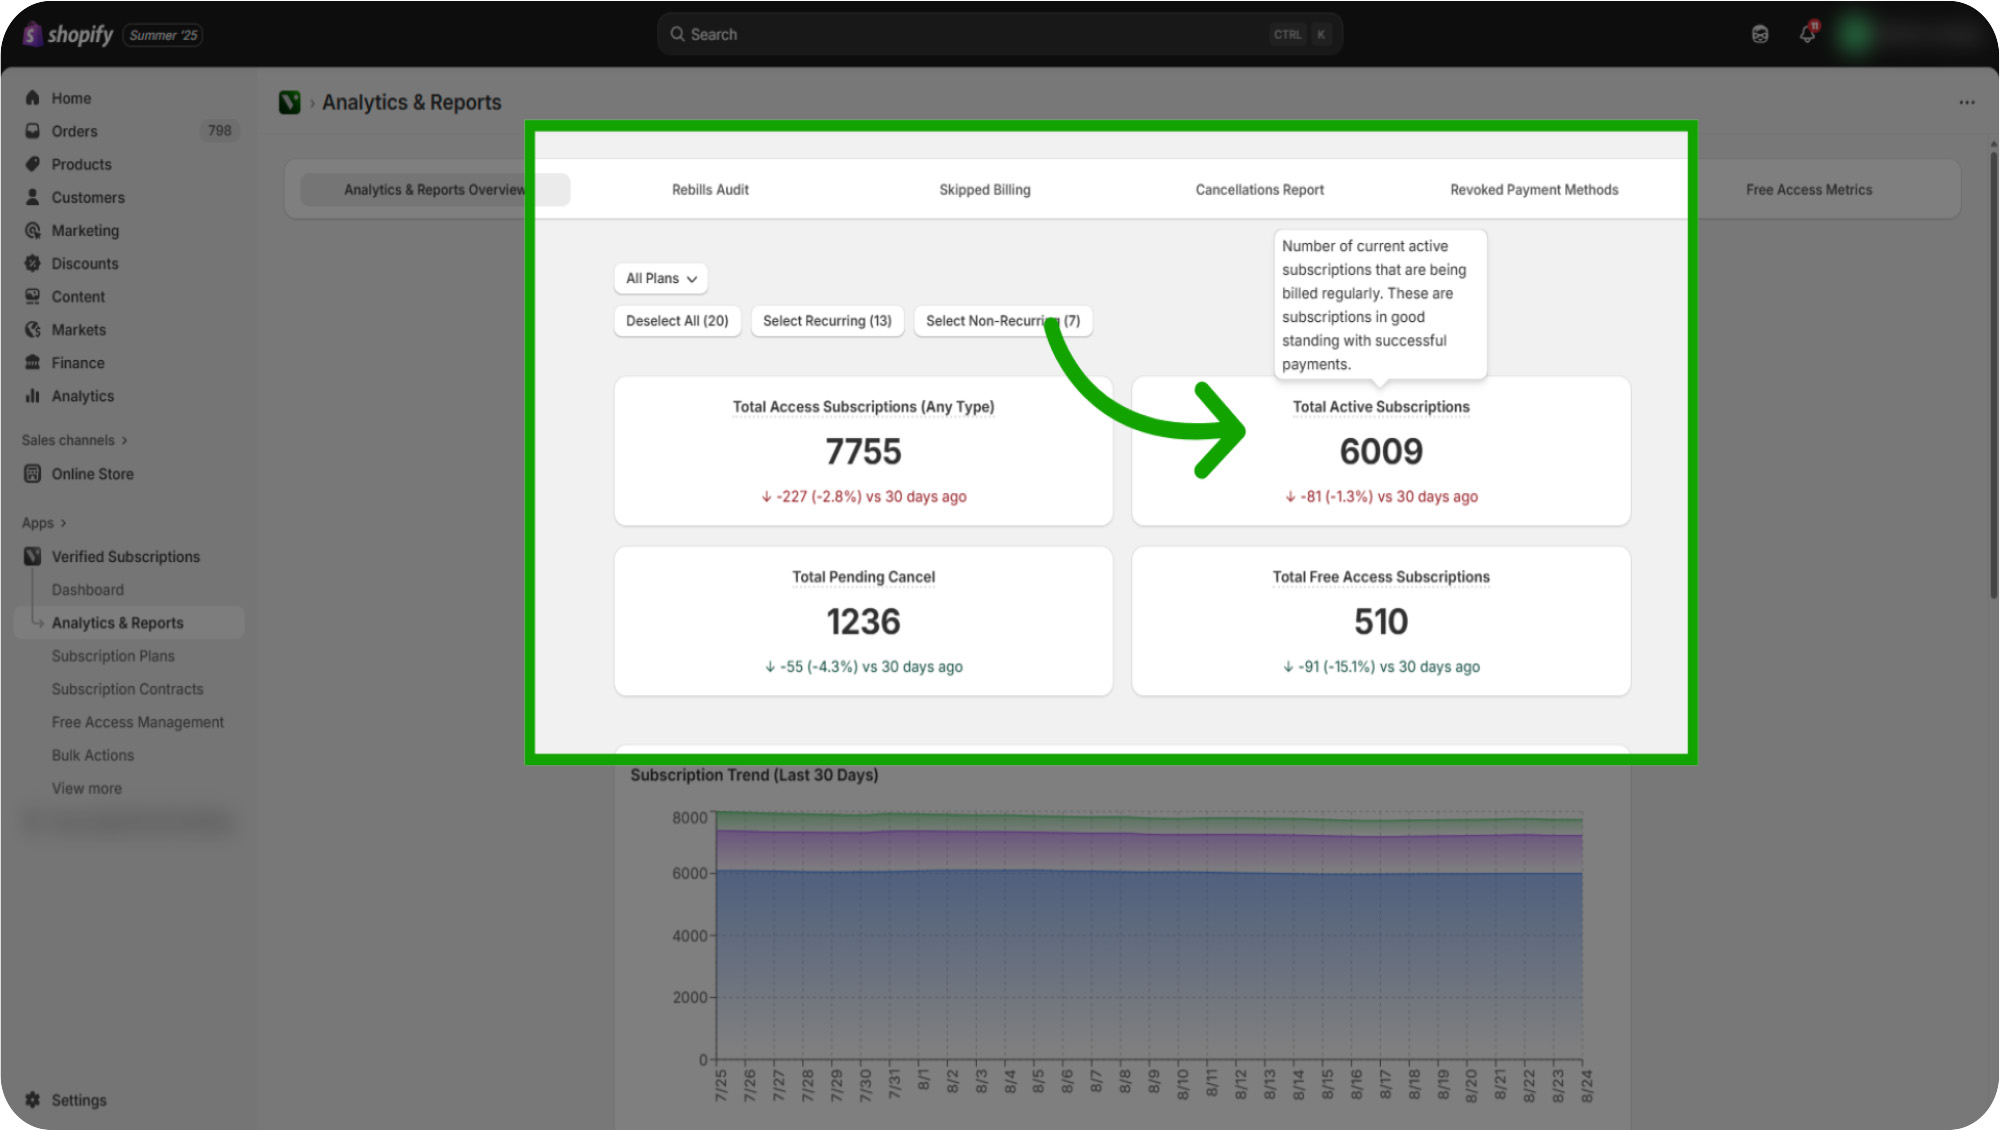
Review "Total Active Subscriptions": The Total Active Subscriptions will allow you to understand how many subscription contracts are currently active.
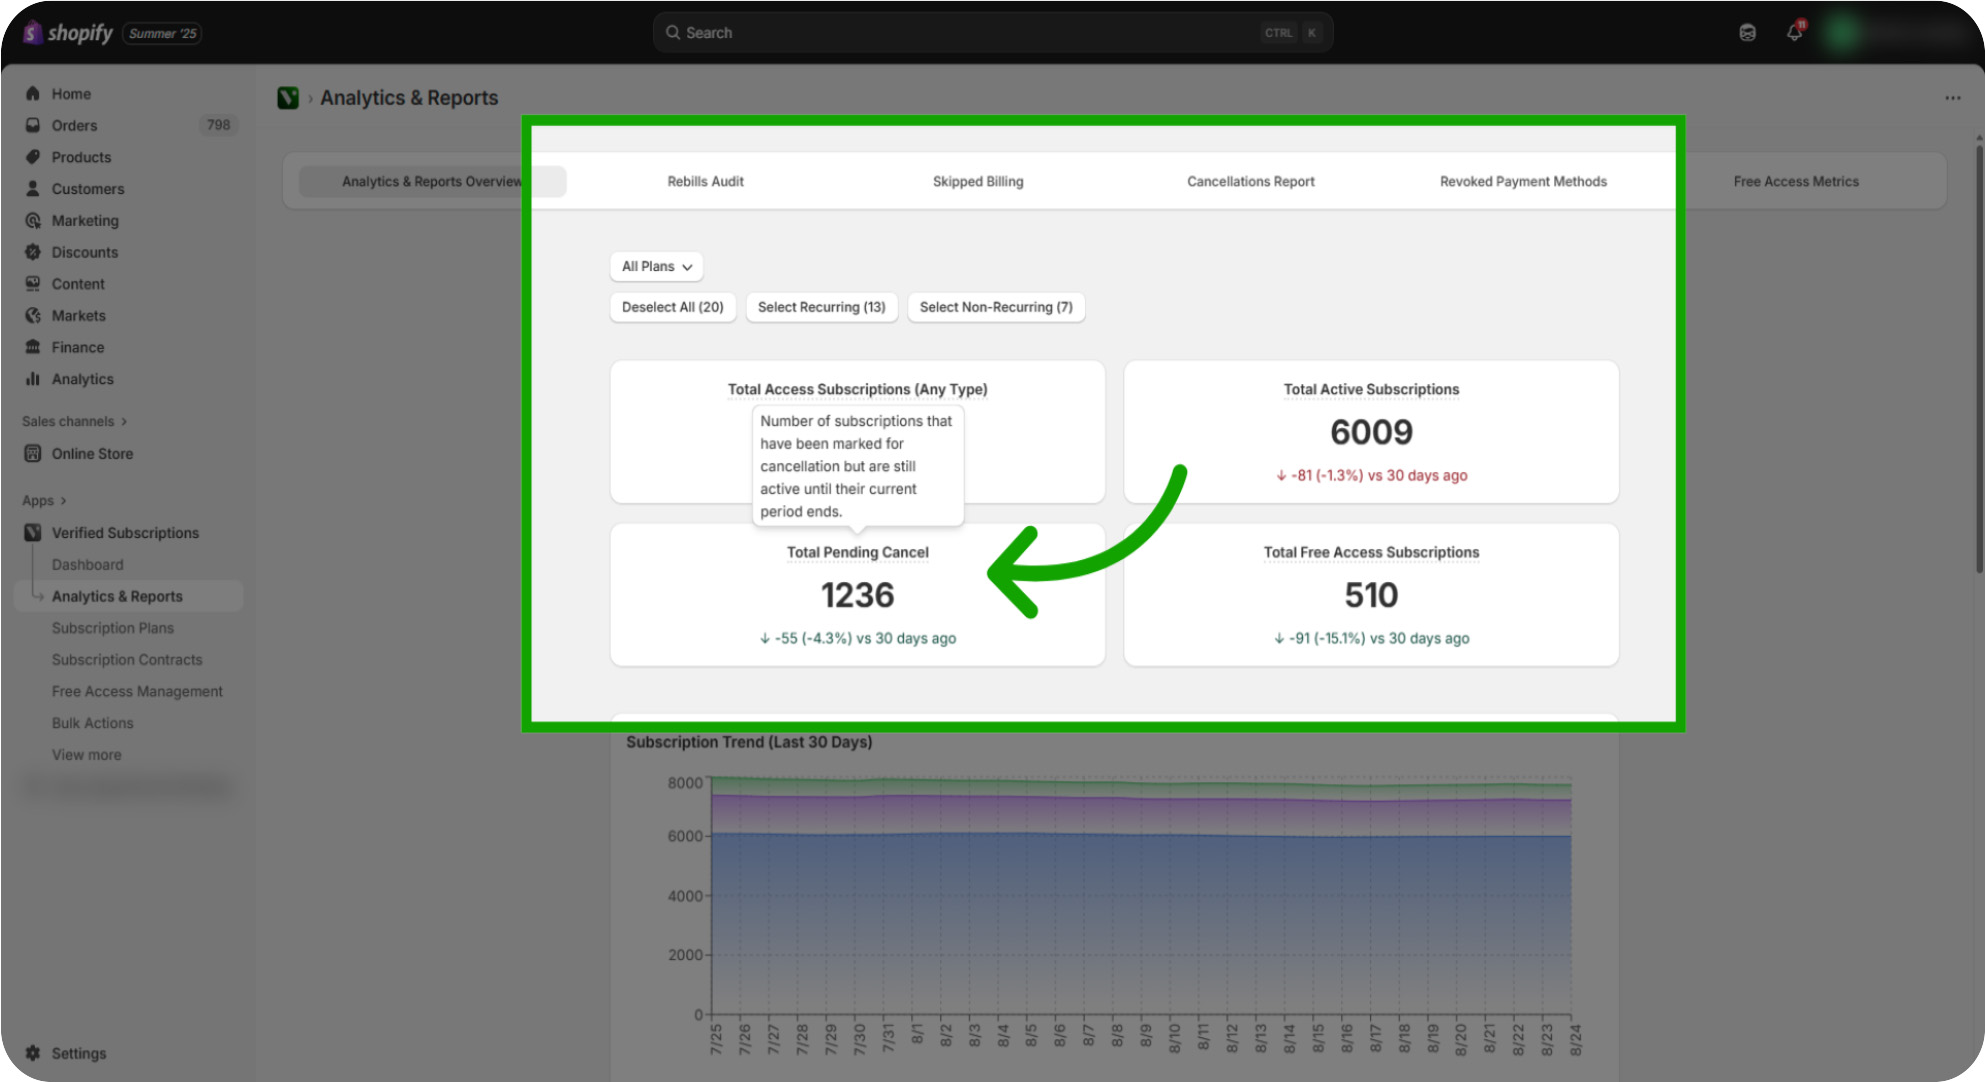
Review "Total Pending Cancel": The Total Pending Cancel will allow you to identify subscription contracts that are scheduled to end soon. Once these end, it is not included in the immediate cancelled numbers. These are separate cancellation numbers.
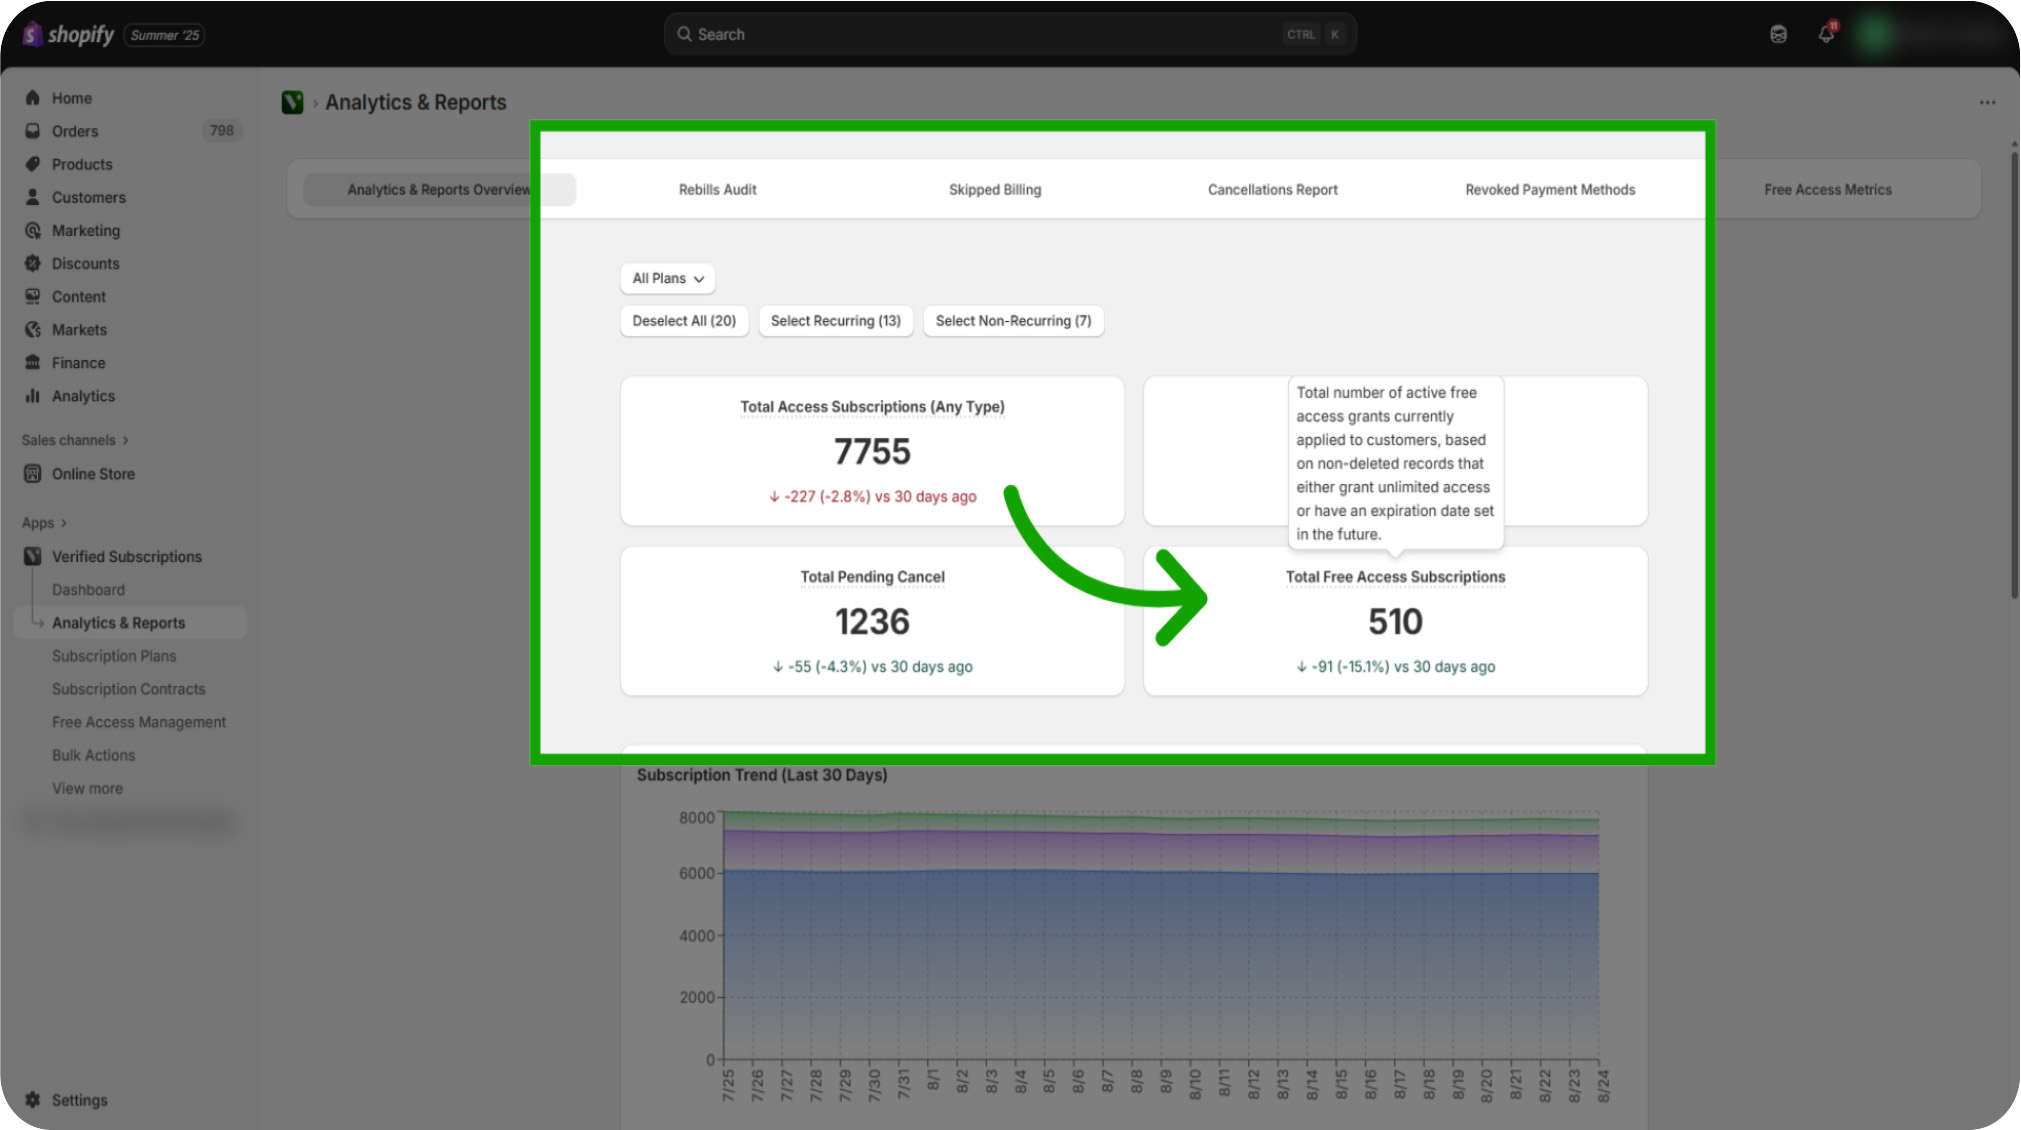
Review "Total Free Access Subscriptions": The Total Free Access allows you to identify how many users are accessing your service without charge. Check out the Free Access Metrics video to understand more.
Review "Subscription Trend (Last 30 Days)": Scroll down to view the Subscription Trend graph. This data is for the last 30 days to visualize subscription contract growth and decline patterns. Take a look at the guide to see what color matches what category for a better look at the subscription trendline.
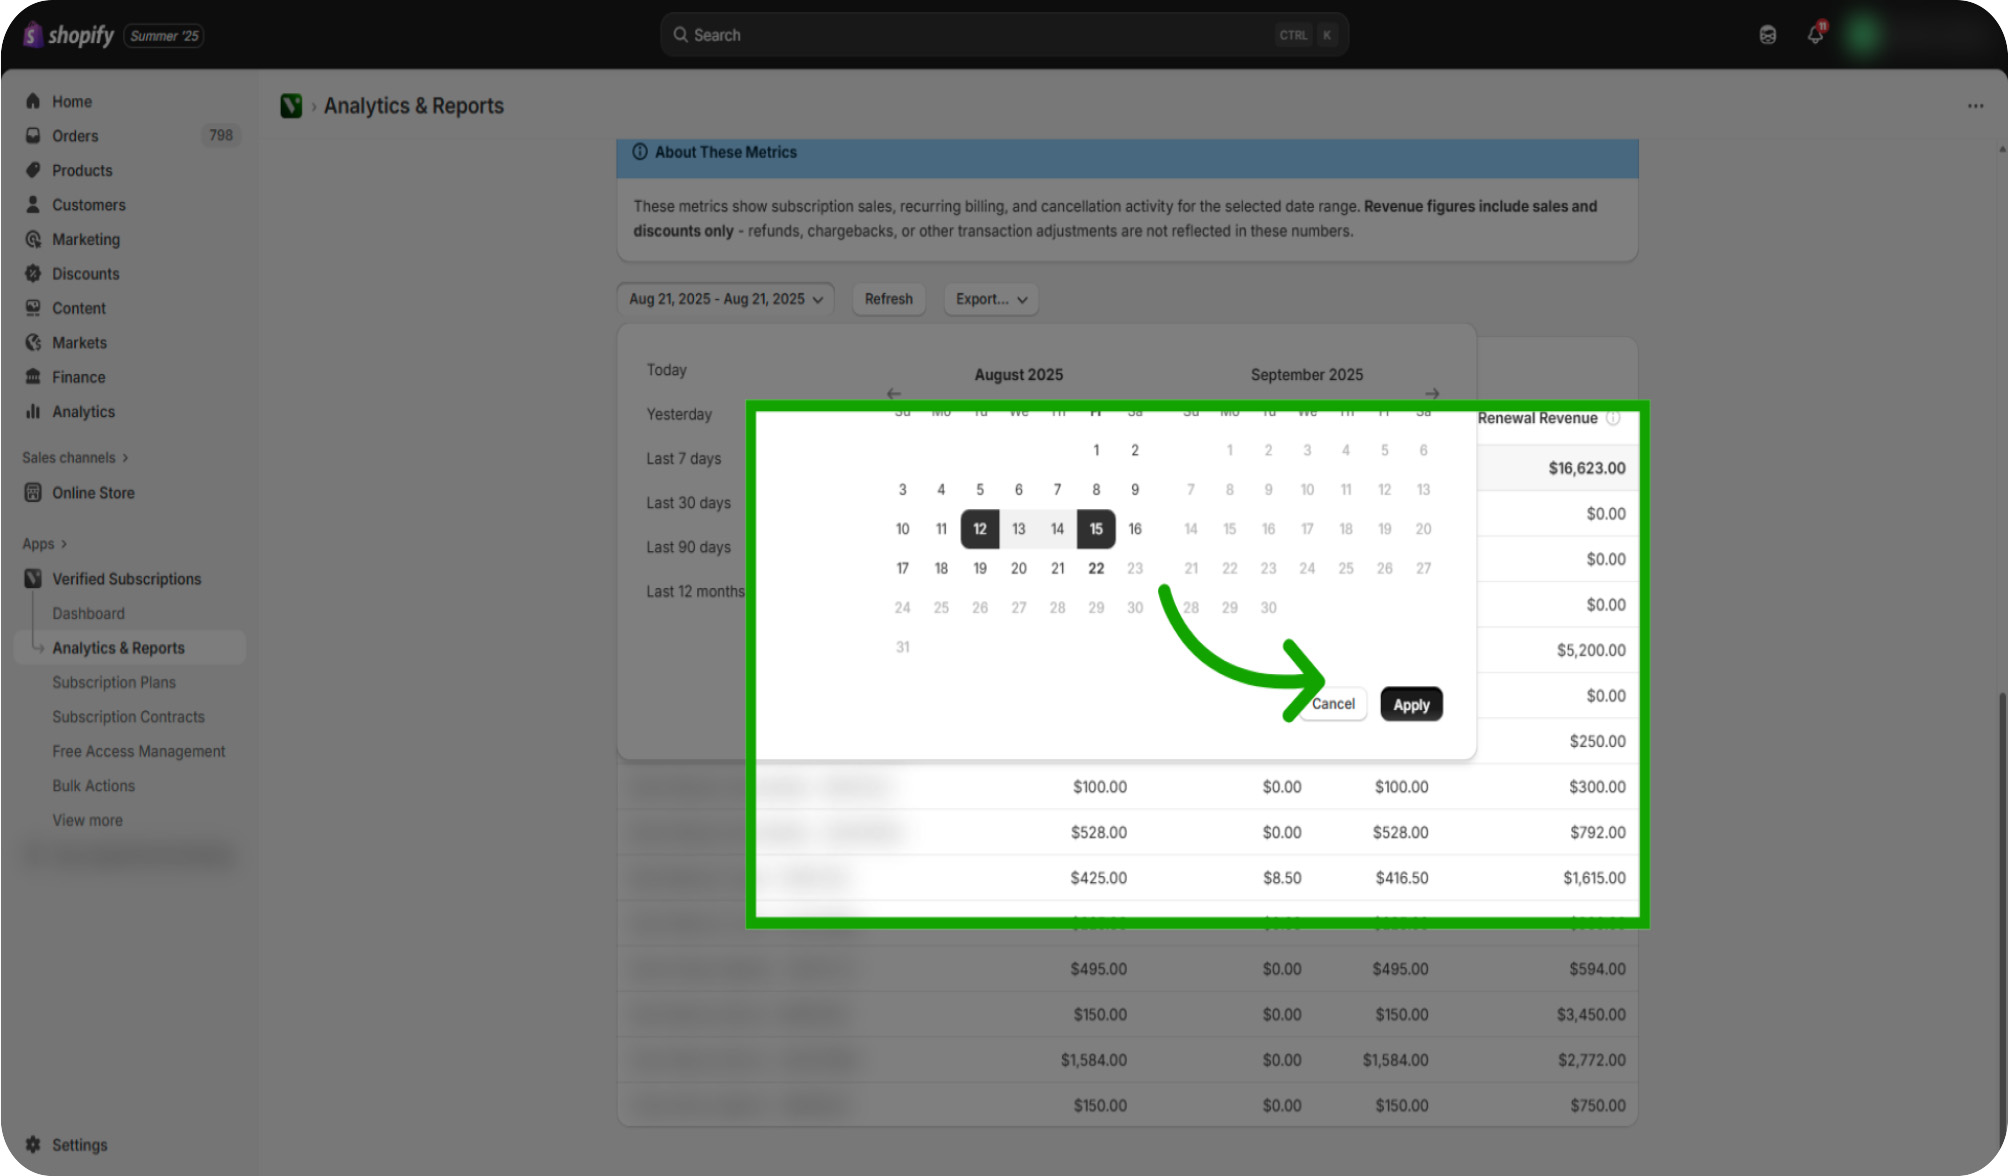
Click "Yesterday": Scroll Down to view the subscription contract specific data. Adjust the start date by clicking Yesterday & filter down to the date you are wanting to analyze.
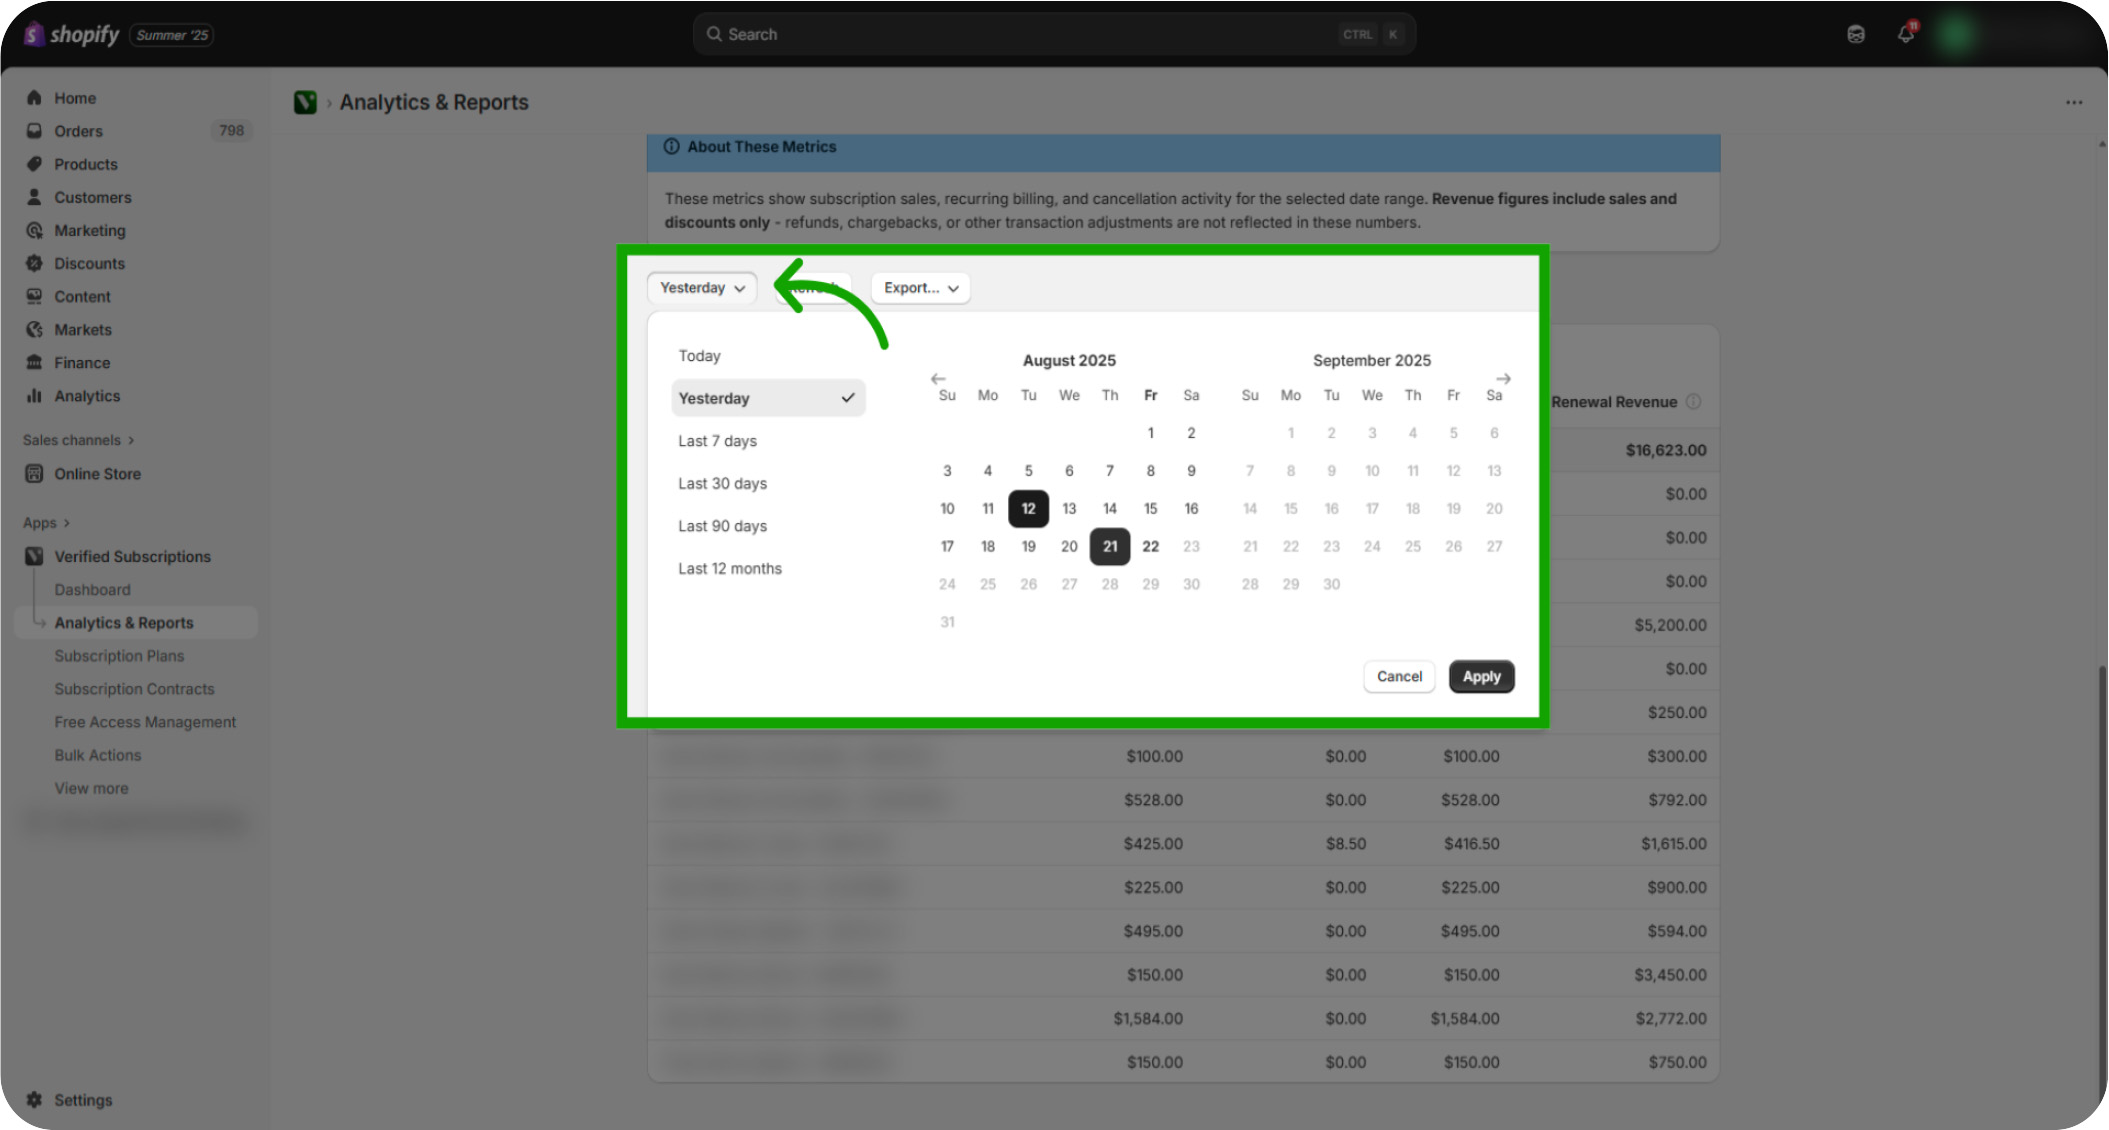
Click "Apply": Then Click Apply for the selected date range to refresh the report with your specified timeframe.
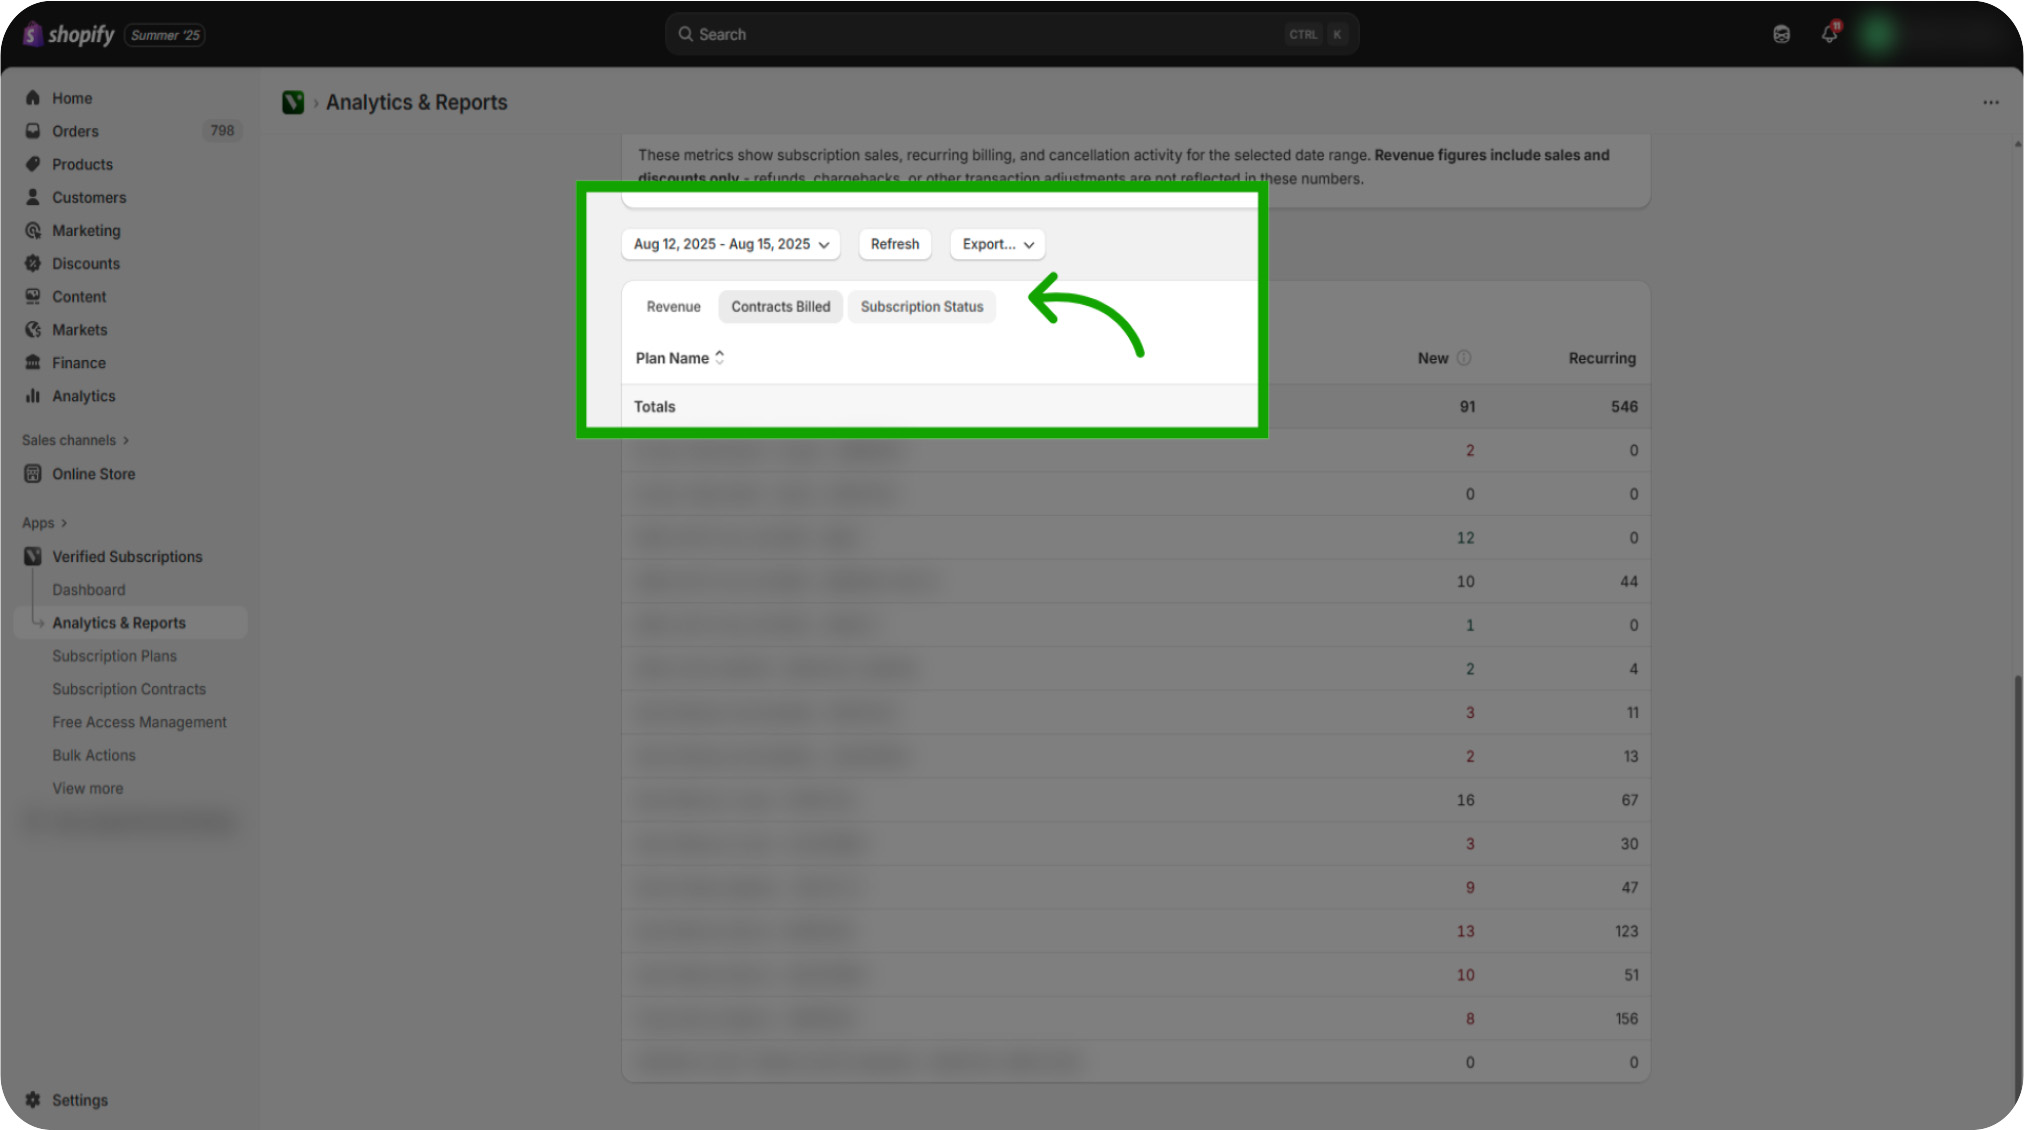
Click "Revenue": Focus on the Revenue tab to analyze income generated from subscription contracts during the selected timeframe.
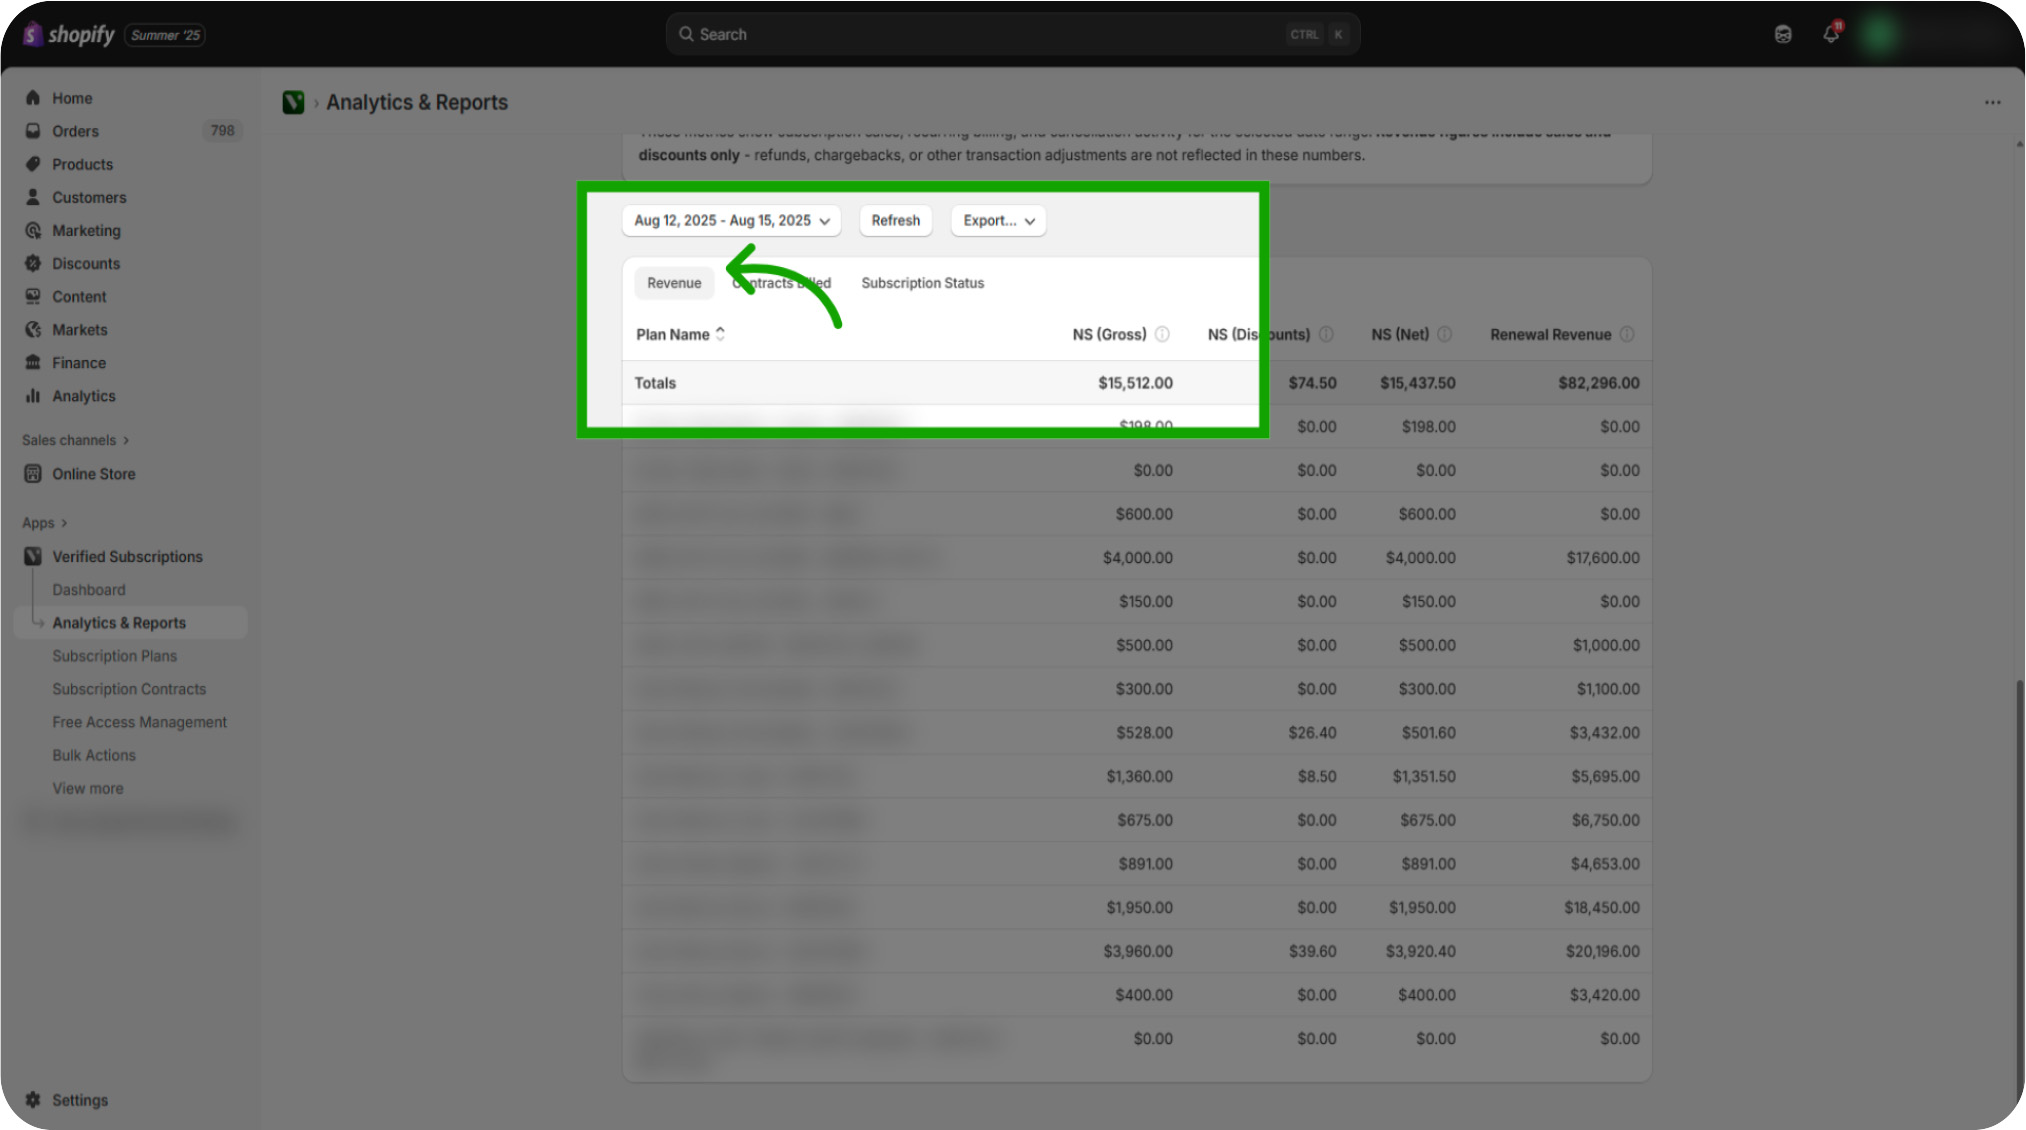
Click "Contracts Billed": Switch to the Contracts Billed view to review the number of subscription contracts invoiced.

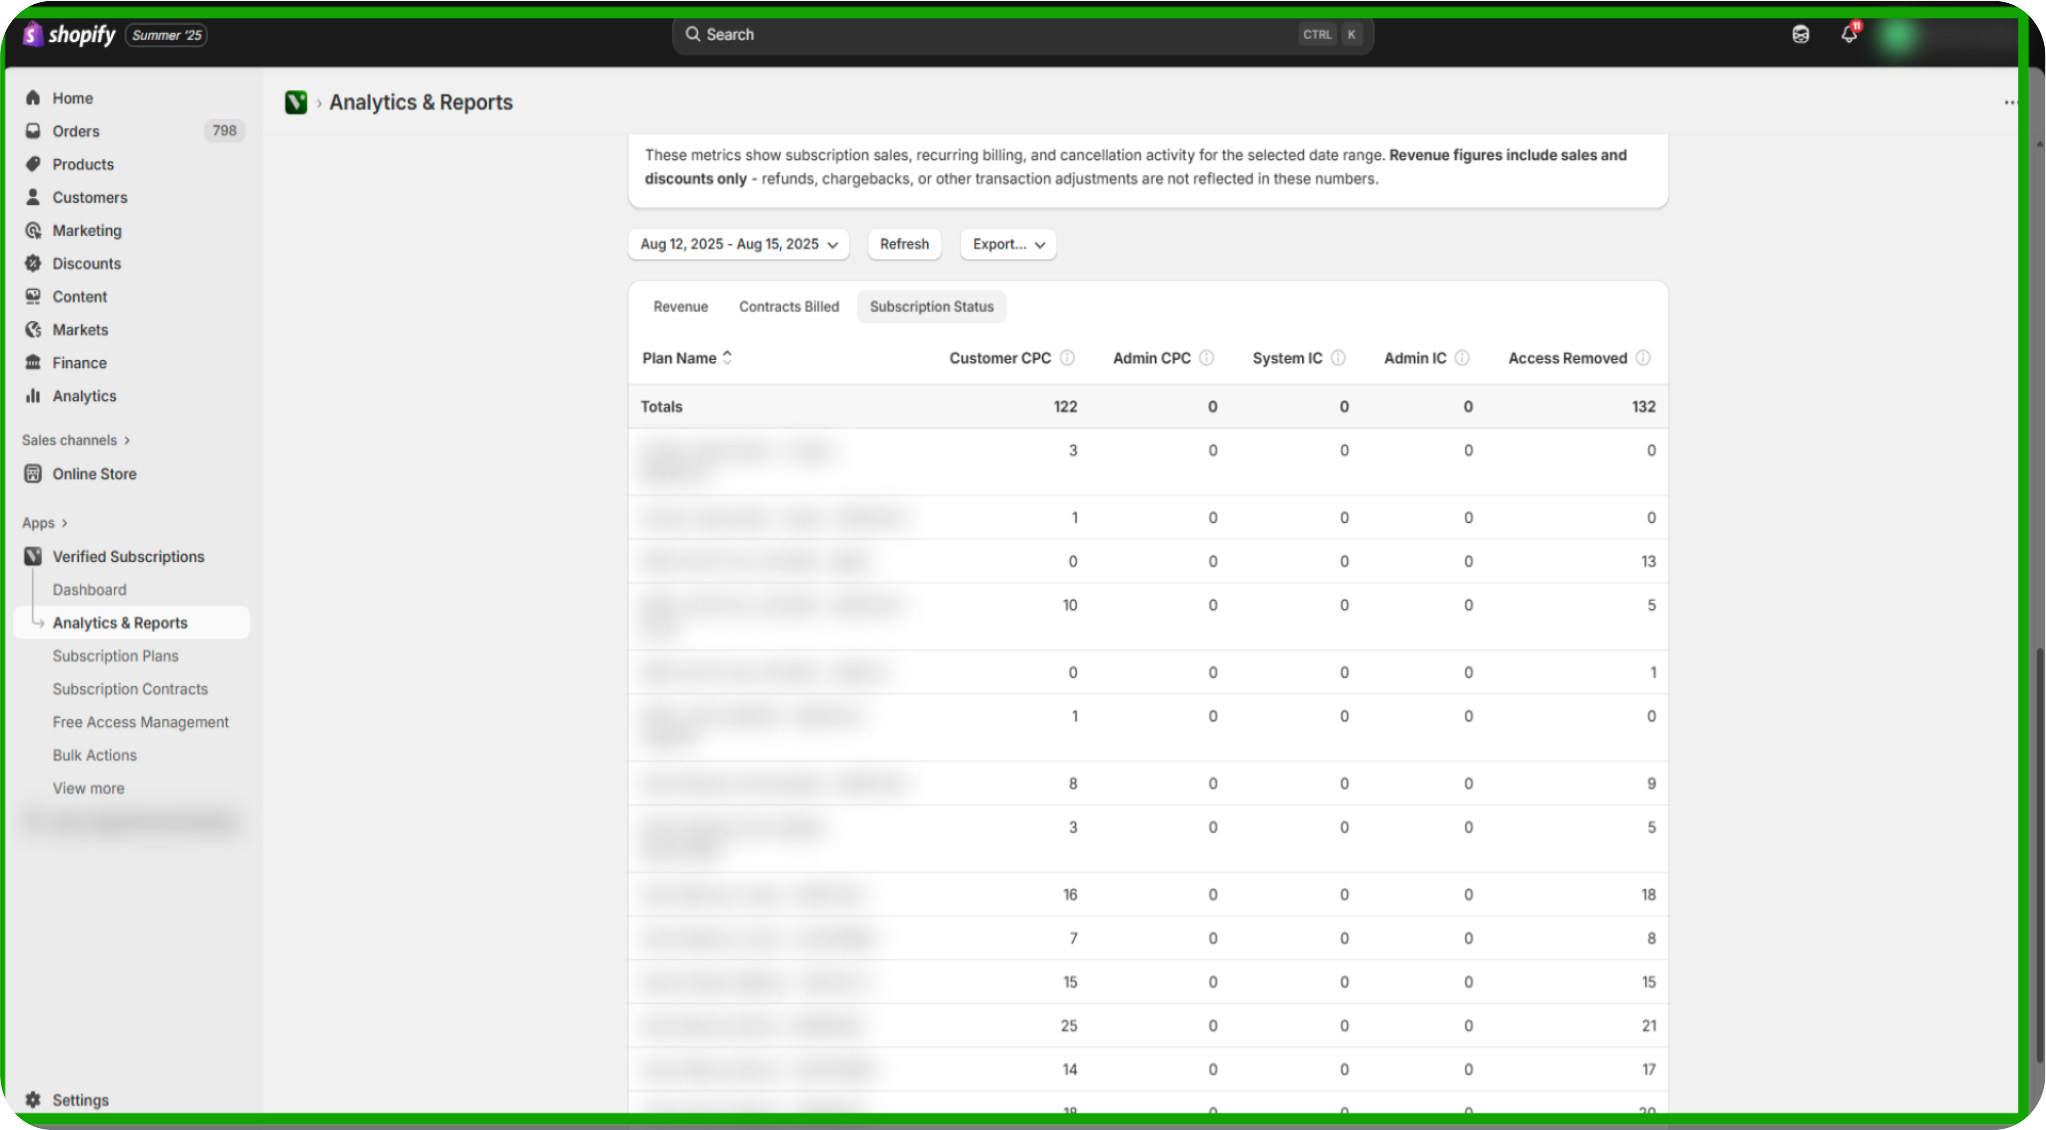
Click "Subscription Status": Examine the Subscription Status section to understand the current state of all subscription contracts.
View Overall Analytics & Reports: Revisit the Subscription Status tab to confirm your filters and review the updated subscription contract data.